Last updated 11-15-2011 Tue |
|
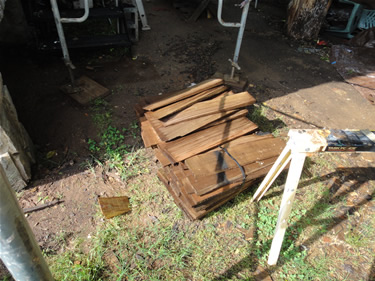
Remember to use your refresh button to get latest pictures.In upper right use Page Zoom OR ( CTRL + or CTRL - ) to enlarge pictures to fit your screen. Important find 8-20-2009. Removed 1 flooring board from the top layer of the three layer floor. The board had " LESTER LUMBER CO INC ...MARTINSVILLE, VA. " on it. It was established in 1896 by G. T. Lester as a small sawmill and planning mill with a small track of timber land. The company still exists and the president is George W. Lester who is chairman of the board and President. They are going to provide more information to me later. |
|
 |
 |
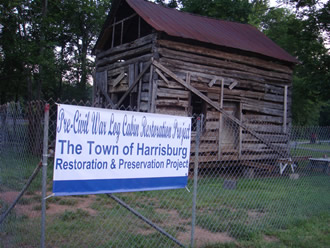
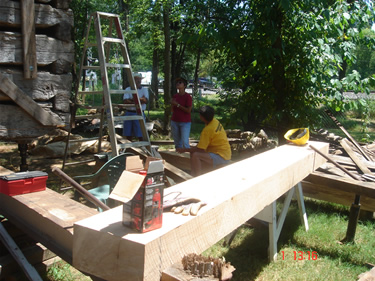
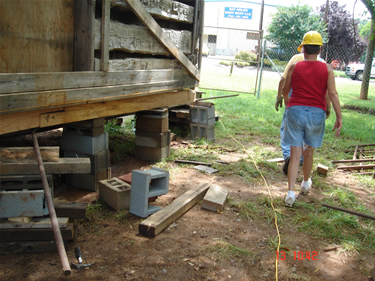
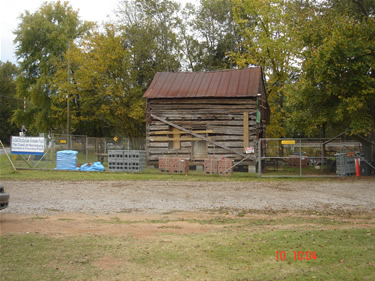
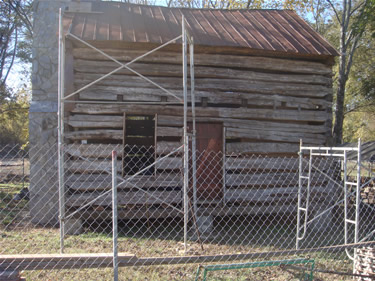
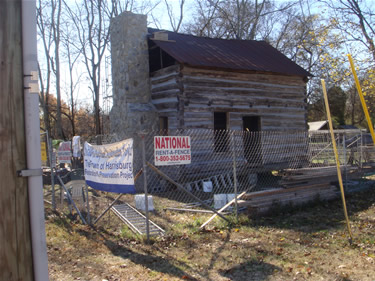
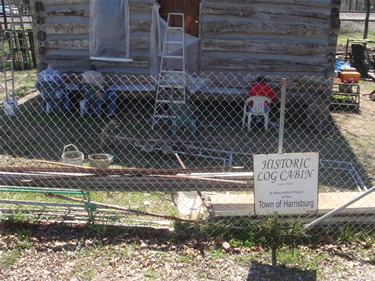
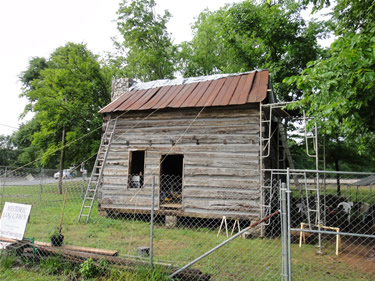
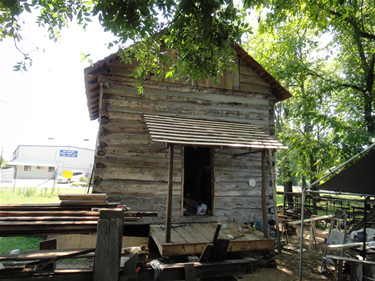
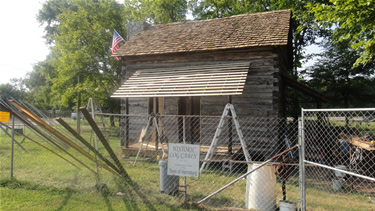
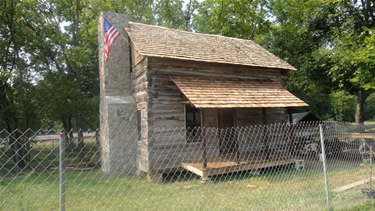
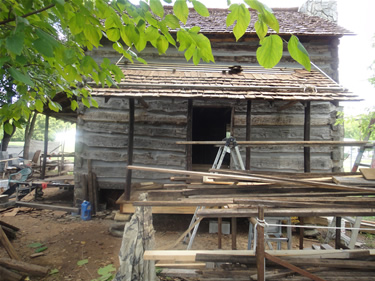
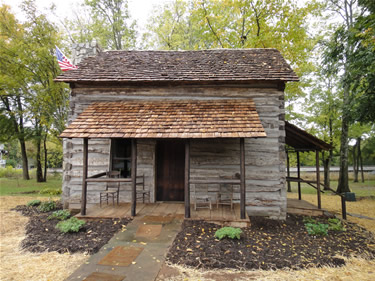
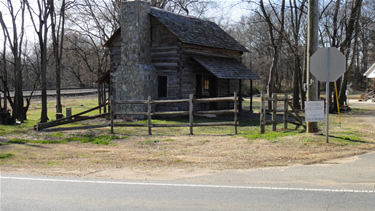
. Cabin donated to The Town of Harrisburg by Margaret Ann Stallings.This picture is out of sequence. It was placed first to show the general situation at the restoration site for the start of the restoration. Restoration sign by Bob Johnson . Picture taken 6-25-2009 536 |
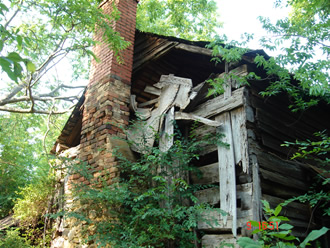
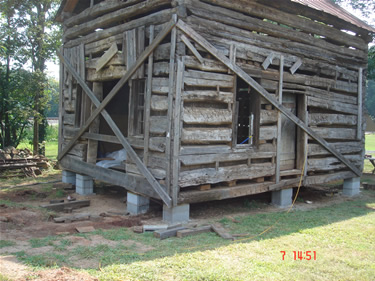
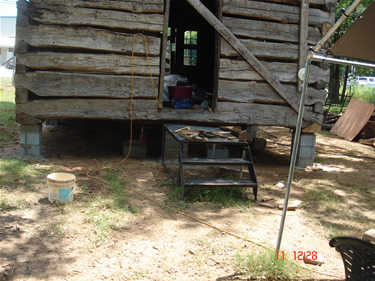
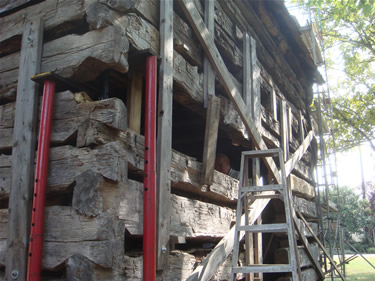
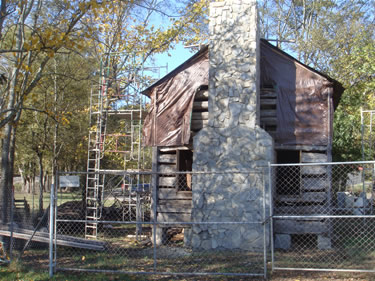
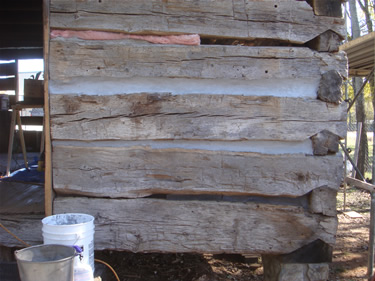
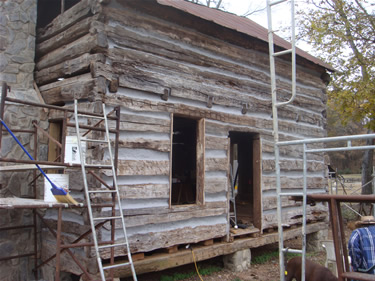
Right ( South side ) of cabin as found. Melanie Bunn Coley told me of the cabin on 6-3-2005 Sat while I was operating the store. Picture taken 6-9-2006. 670 |
 |
 |
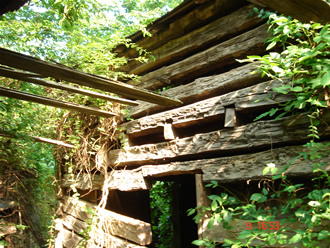
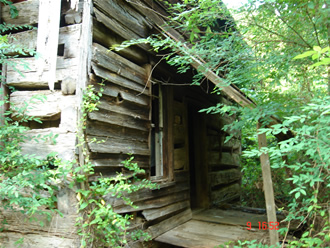
Rear ( East side) of cabin as found showing roof boards over wood walkway to separate kitchen area. Picture also shows in the lower right corner the only missing log- It is probably someone's mantle now. Later discussions with Margaret Ann Stallings indicated the wooden walkway had wooden sides as she said the cabin had the appearance of a ranch style house. Picture taken 6-9-2006. 661 |
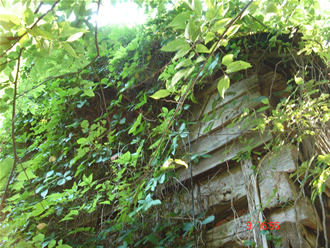
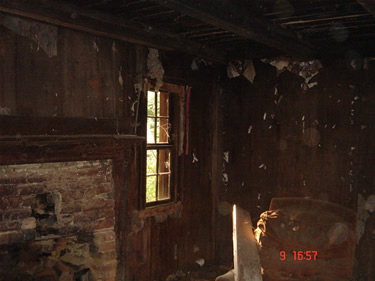
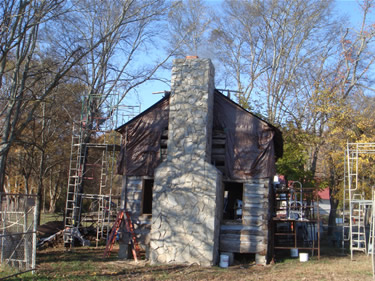
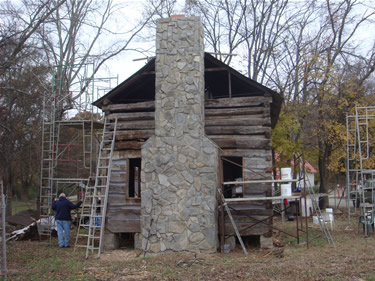
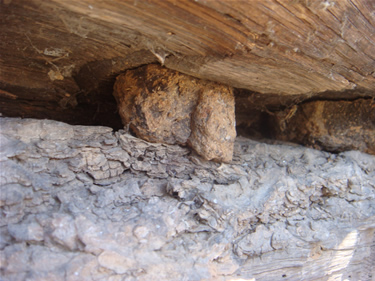
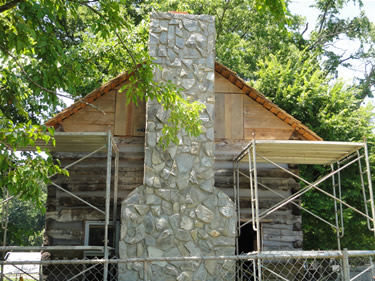
Left ( North side ) side of cabin showing chimney, cement patch in chimney rock work was dated 1992. The patch is stored in the cabin. On this side of the cabin, App 100' away was located the most beautiful rockwork well I have ever seen. There are pictures of the inside of the well. For safety reasons it was filled in by the moving contractor. Picture taken 6-9-2006. 654 |
 |
 |
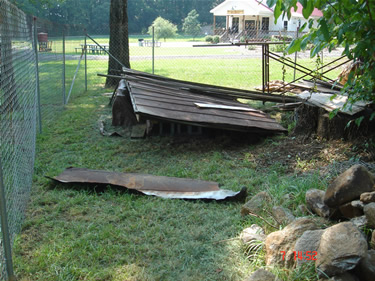
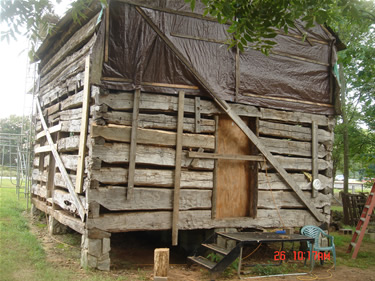
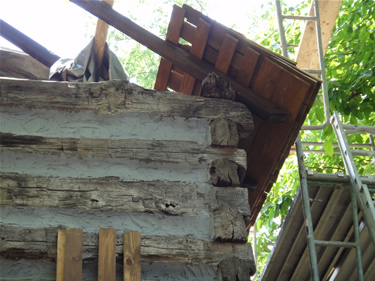
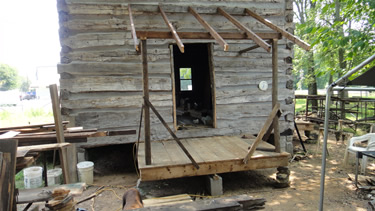
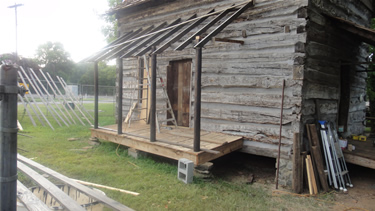
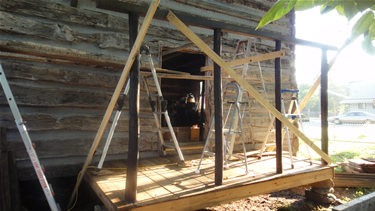
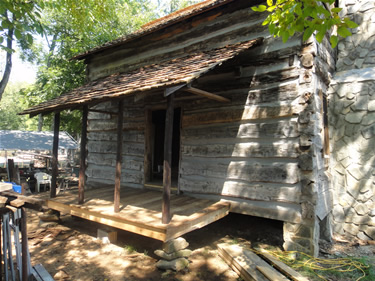
The front porch of the cabin and the tin roof was saved and relocated to the park for reuse or to use as a pattern for a new porch roof. Margaret Ann Stallings gave the cabin to the town on 6-9-2006 Fri. Picture taken 6-9-2006. 656 |
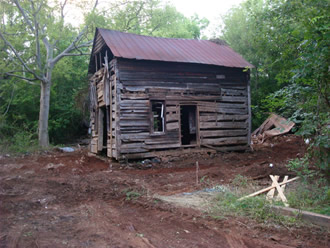
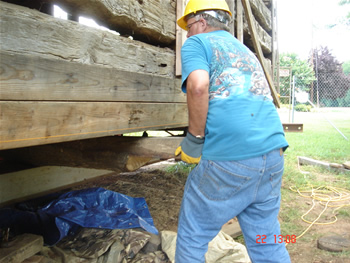
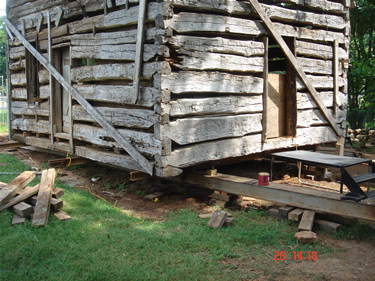
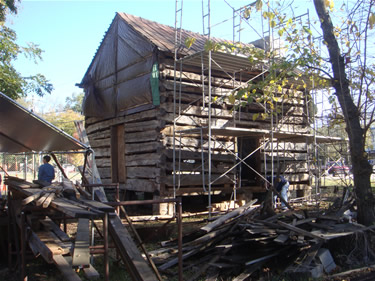
8-8-2008. 654 Cabin cleared 7-29-2008 for moving by Scott Grading. The top 4 logs were lowered 8-7-2008. The cabin move was filmed. The collection of all the paper work found at the site was still in the cabin on the day of the move and was accidentally buried with the bull dozer. |
 |
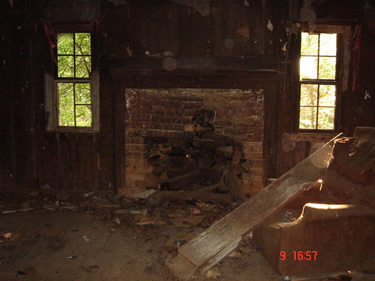 |
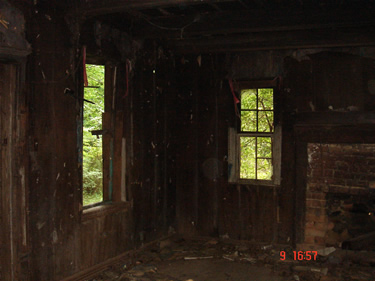
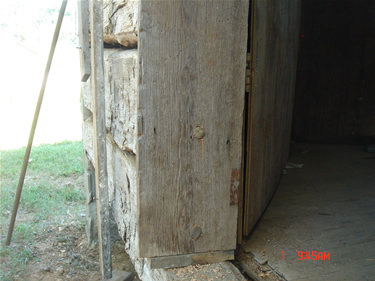
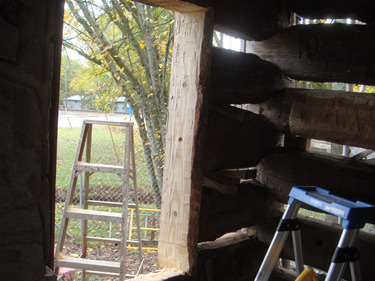
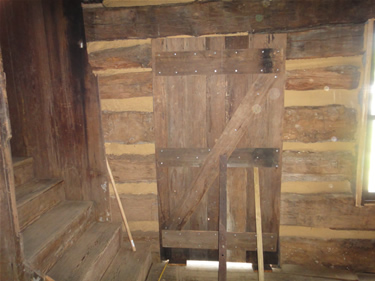
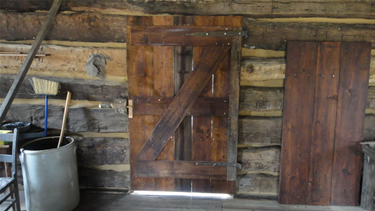
674 View of the edge of the front door to the left edge of the fireplace. The fireplace was removed for the relocation to the town park. |
675 View of fireplace. The board propped on the chair is a door frame that was left from a previous attempt to move the cabin. |
 |
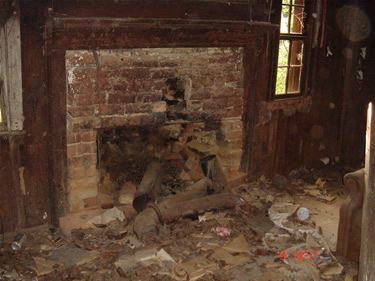 |
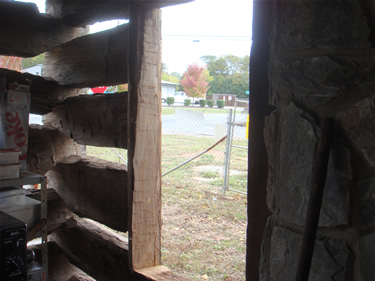
677 View of right side of the fireplace to the north end of the east wall.. |
678 View of fireplace. Visible is the hole knocked in the brick to convert the fireplace to a stove. Stove pipe is laying in front of the fireplace. The stove was missing from the cabin. |
 |
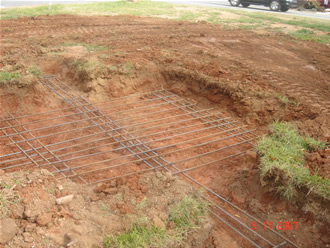 |
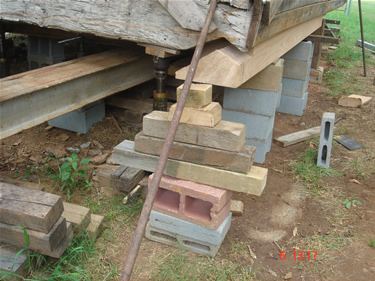
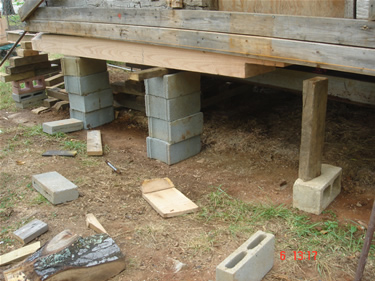
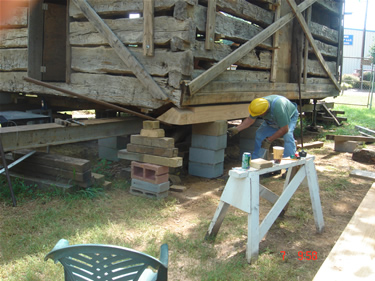
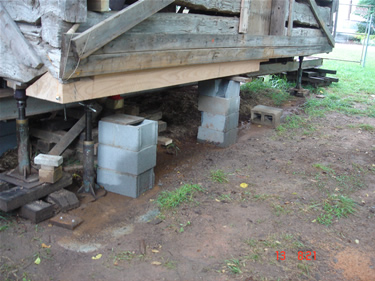
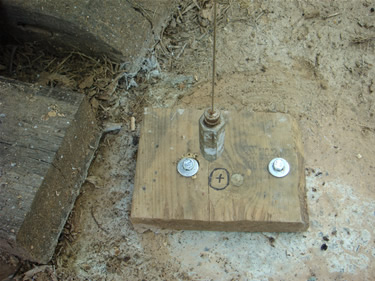
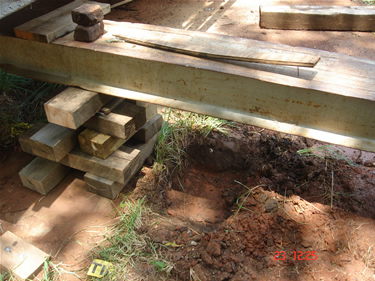
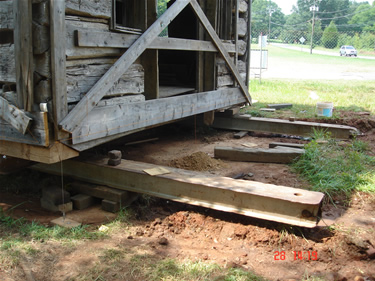
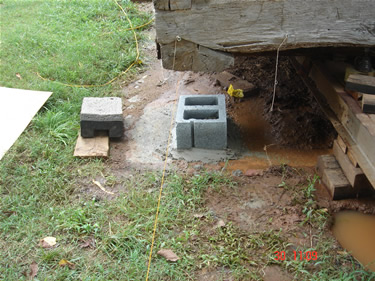
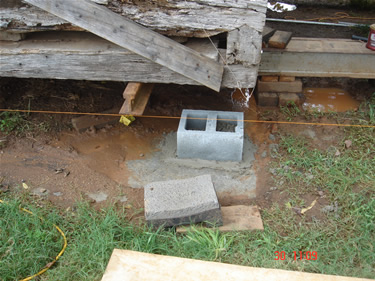
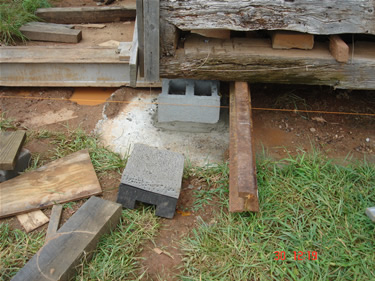
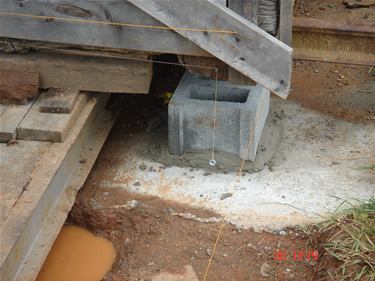
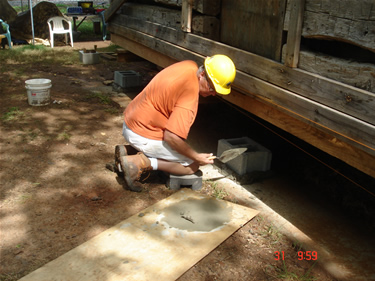
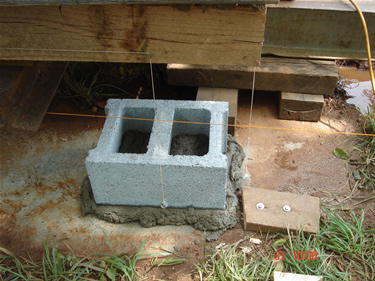
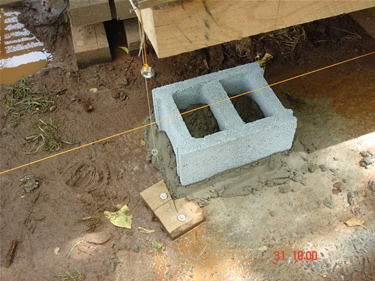
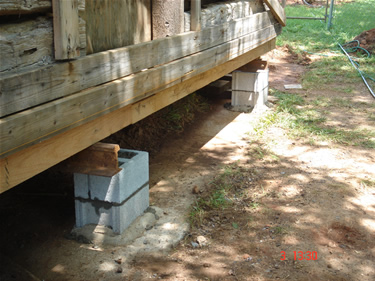
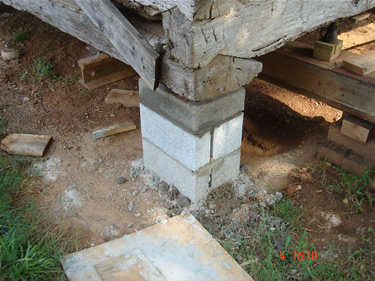
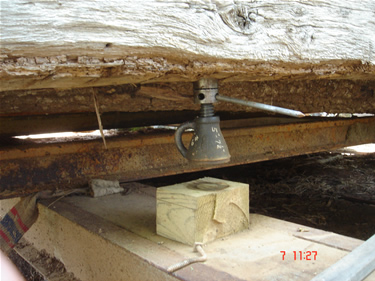
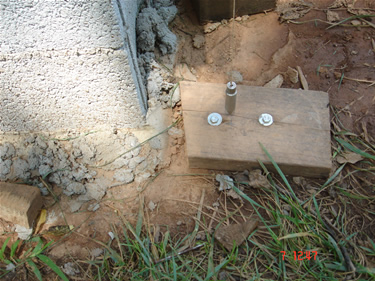
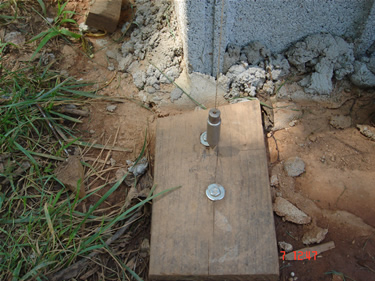
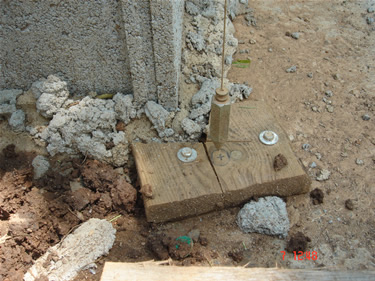
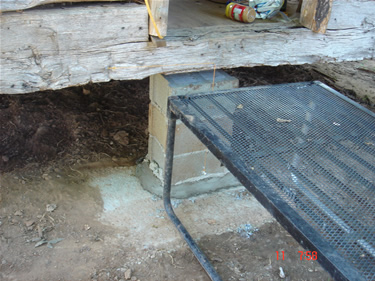
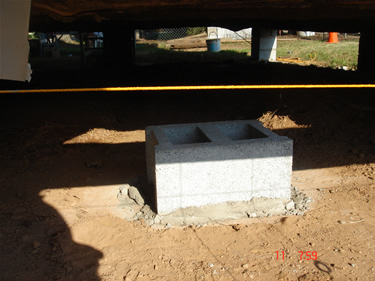
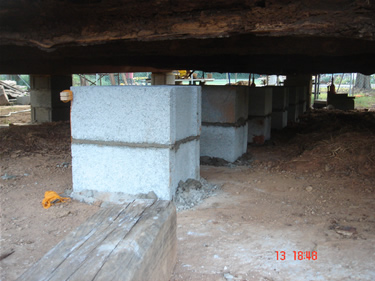
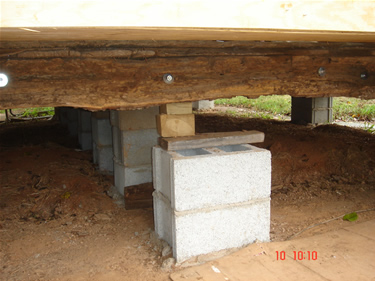
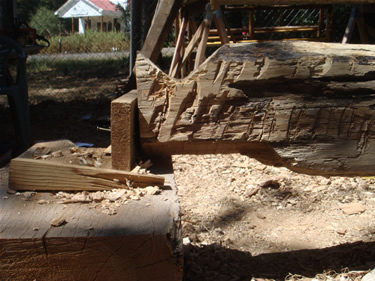
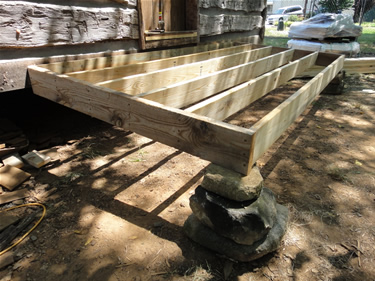
Cabin Footing. 11-9-2007 by Bret Earwood. 4301 |
Cabin Footing. 11-9-2007 by Bret Earwood. 4303 |
 |
 |
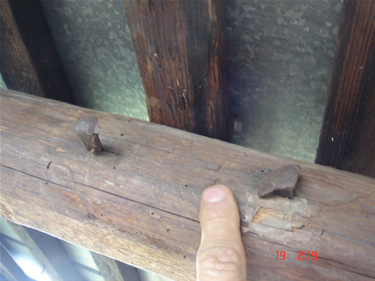
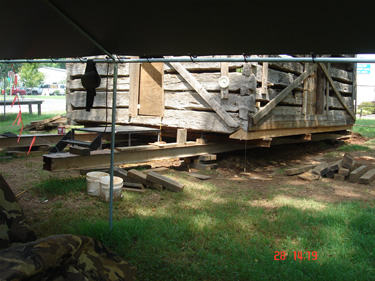
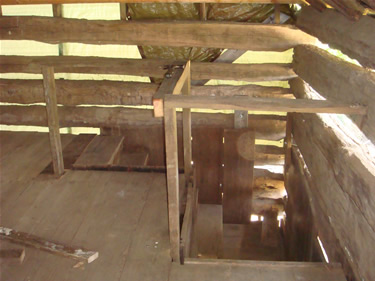
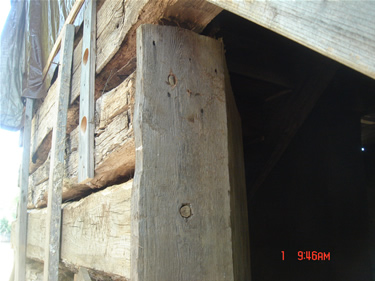
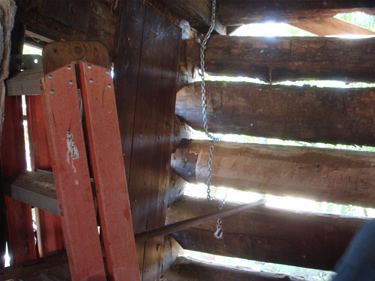
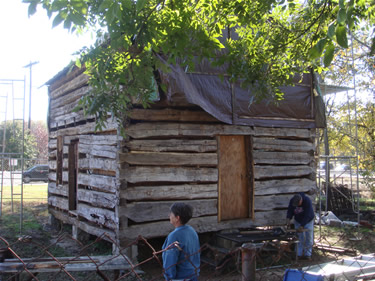
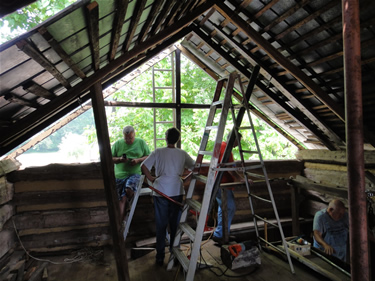
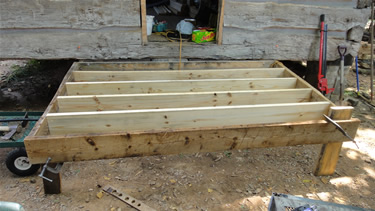
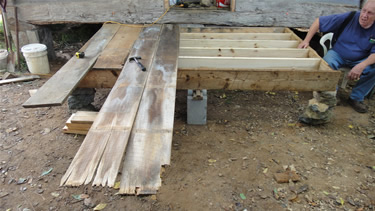
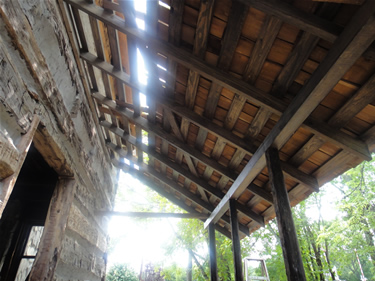
| Large hand made nails in ceiling rafters- use presently unknown. Nails were saved for later display. 5347 | The cabin in place in the park and the 4, second floor logs being reinstalled by the mover. The long diagonal 2x6's were saved and later used as ledgers and headers for the porches. 8-11-2008. 206 |
 |
 |
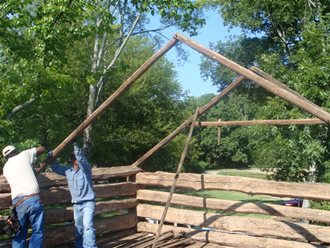
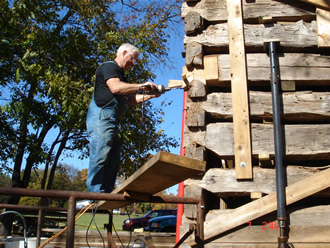
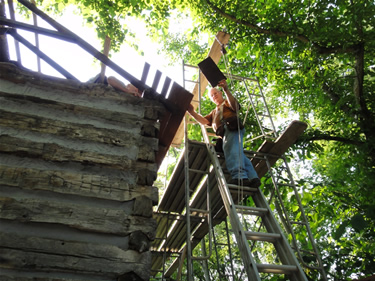
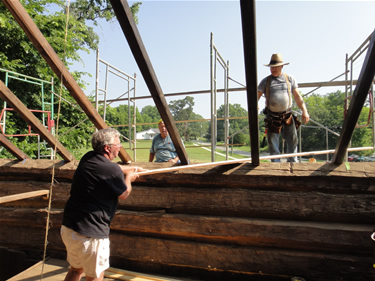
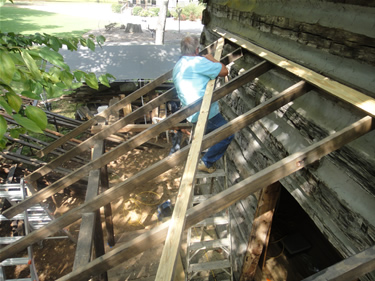
View to the SW. The rafters were half lapped and pegged with a Roman Numeral numbering system cut into them. It is interesting to see that the number 4 was shown as IIII rather than as IV as I had earned them. Cabin roof rafters being reinstalled 8-11-2008 by "Body Guard". 220 |
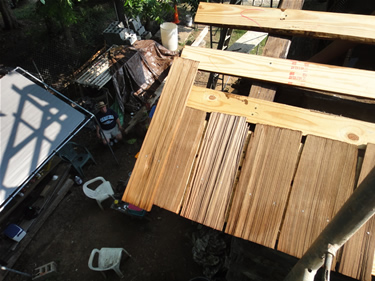
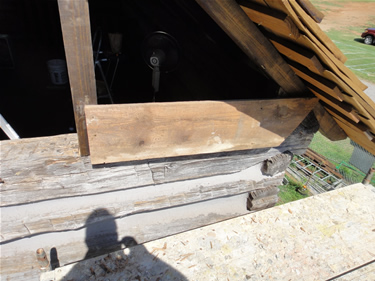
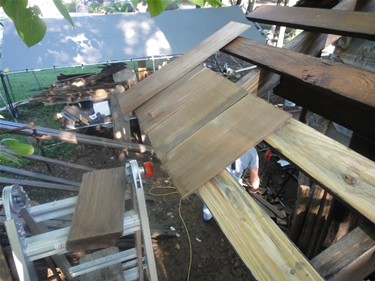
Cabin roof slats being reinstalled, they were originally spaced for cedar shingles and were reinstalled the same way. Replacement cedar shingles are on site and will be installed after the cabin is lowered on to the foundation. Shown above in the left wall is the missing log that is probably someone's mantle now. It had been drilled out with a 2" drill leaving only the joint. 232 |
 |
 |
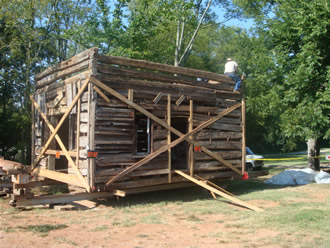
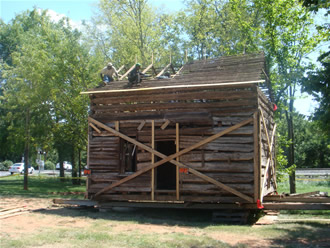
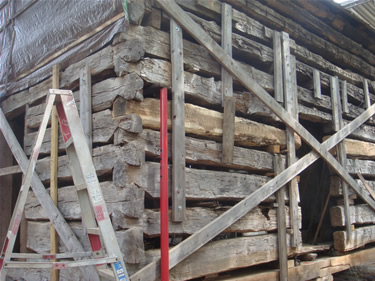
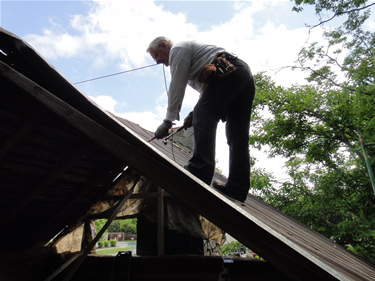
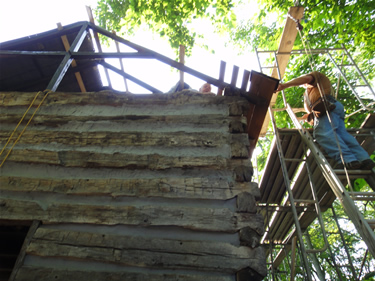
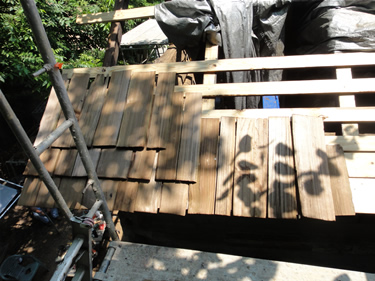
Cabin roof slats and tin being reinstalled 8-12-08. The wood bracing was required for the move due to the structural instability of cabin construction. 237 |
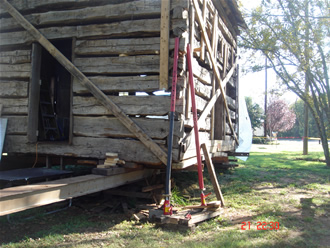
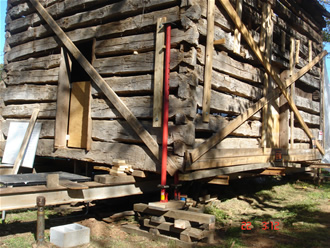
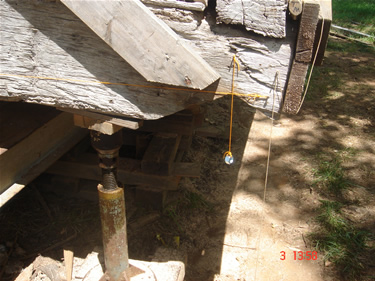
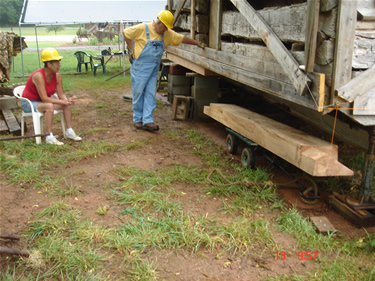
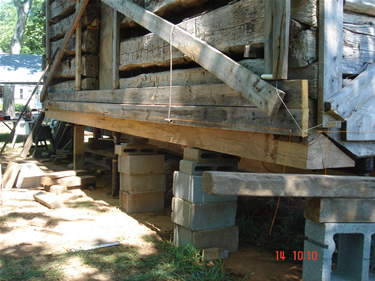
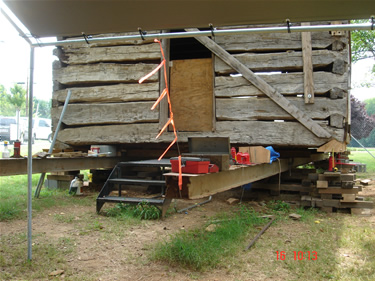
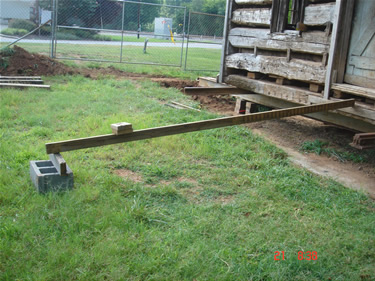
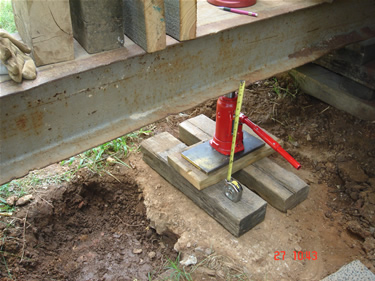
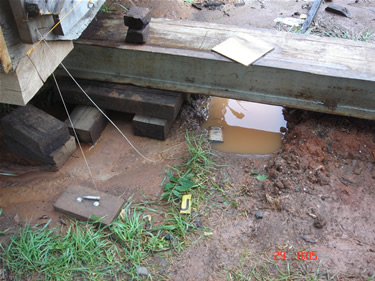
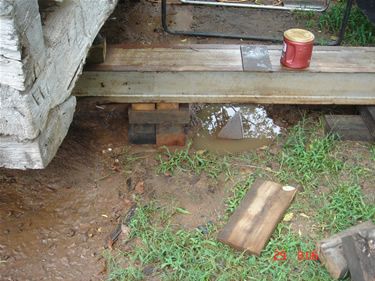
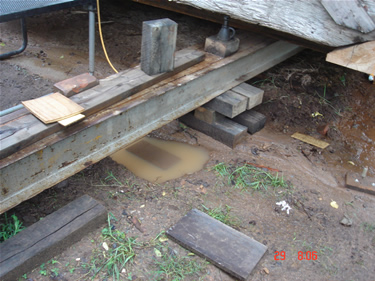
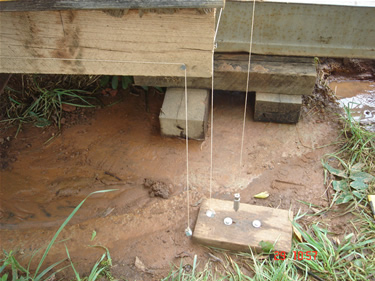
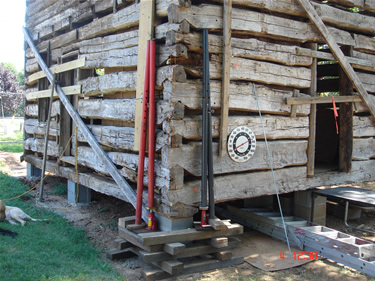
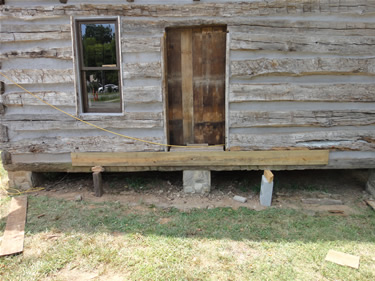
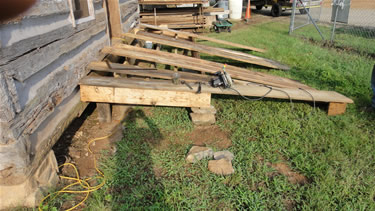
South West Plum to check building movement during jacking. The building was raised and lowered several times to replace under floor beams and to check for fit and clearances. 468 |
 |
 |
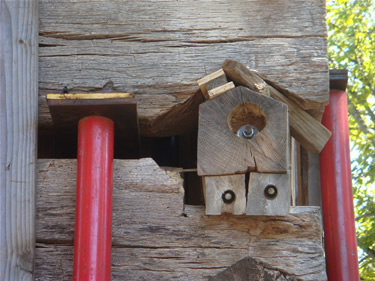
Temporary wood brace and steel cable to keep roof from kicking sides out. Picture taken 9-19-2008 5344 |
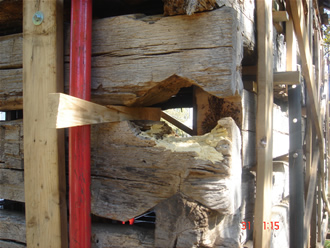
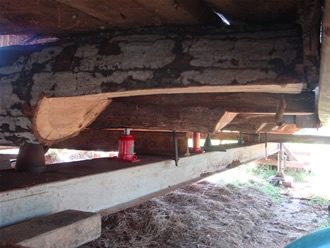
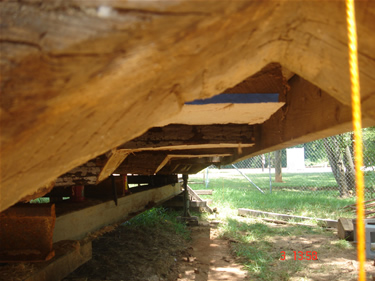
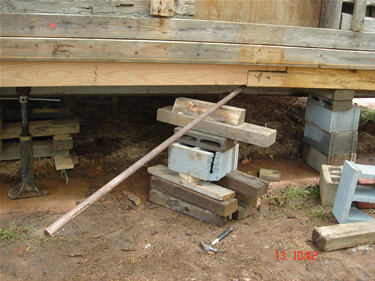
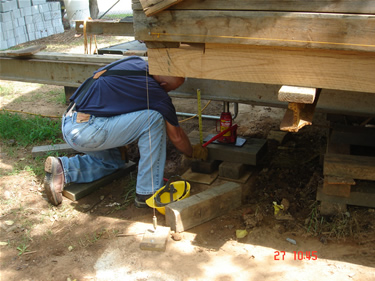
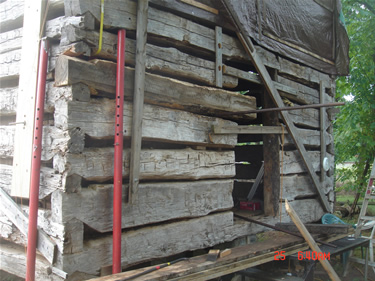
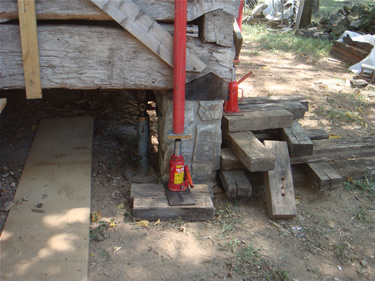
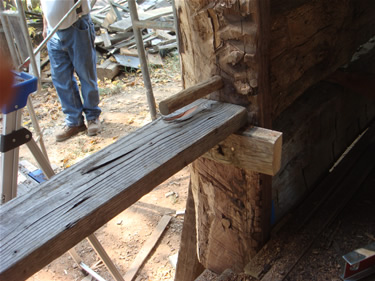
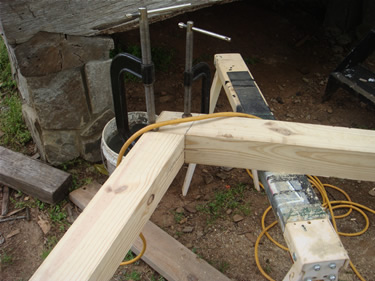
Jack stands raise top logs above the bad joint allowing the separation of the log joint for temporary repair of rotten log end. Three logs will eventually be replaced. Picture taken 10-21-2008 5384 |
 |
 |
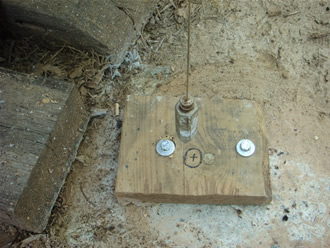
Rotten end to be replaced. Shows 6"x1/2"x16" metal plates with round wood bolted to bottom to fit into the jack stand to prevent stand from sliding off steel. Jack stands were used to separate logs. Picture taken 10-22-2008. 5388 |
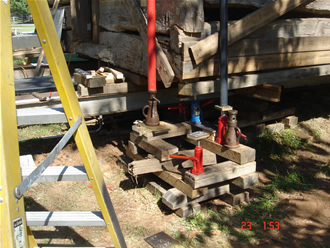
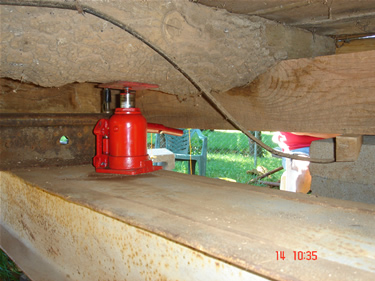
First pair of jack stands on West wall SW corner, one inside and one outside. There is a 1/2" x 6 " x 16" steel plate on top of the jack stands to support the log wall weight above the bad joint. 5390 |
 |
 |
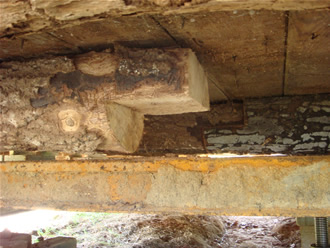
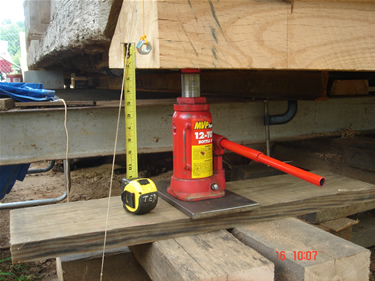
5395 Complete set of 4 jack stands to separate logs allowing replacement of bad end of log. The last screw jack on the right side of the cribbing is the middle size screw jack. It weighs 22 pounds and has a lifting range from 11-1/2 "to 18 ". |
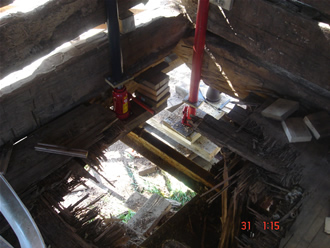
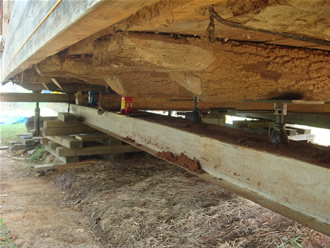
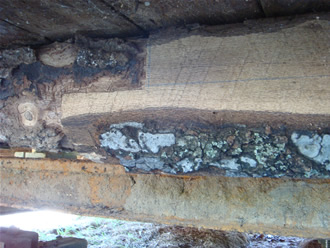
Inside view thru rotten floor in SW corner, The hole and moving steel made placing the two inside jack stands easier. The first floor top layer of flooring is 1-1/8" tung and grove. It is an excellent floor except for the above hole. 5522 |
 |
 |
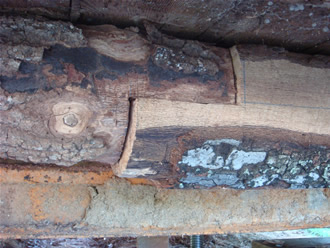
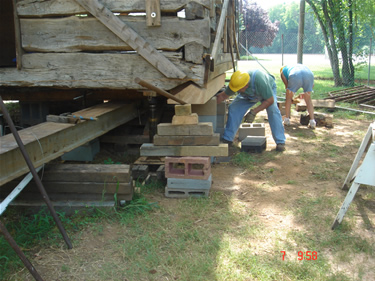
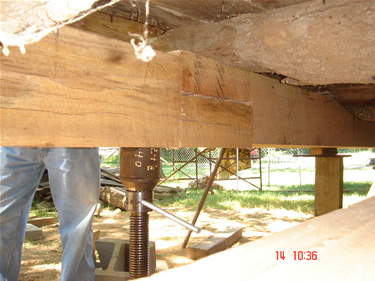
Joint repair. Decided to repair end instead of replacing the complete log. May replace complete log after lowering onto foundation but needed to stabilize the joint during the jacking process. 5524 |
Ted drilling 4 foot hole to get good wood. Had to make a 4 foot long wood lag screw to tie the end for structural integrity. Bob Johnson made this temporary joint. It was removed when the bad log was replaced with a new one provided by Mike Wallace.5573 |
 |
 |
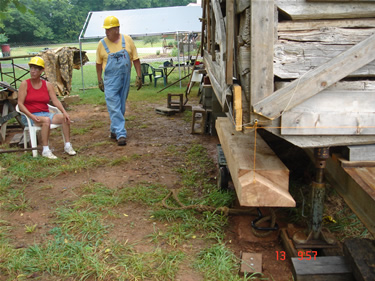
South East Plum to check building movement during the jacking operation. The cabin would be raised and lowered several times to replace the bad logs under the floor and to check fit and clearances 472 |
C-clamp used to clamp rail during jacking operation. As the South side of the cabin was raised for wood replacement, the rails would lift from the moving steel so they had to be clamped down. First new notched replacement log shown on right. These logs were supplied by Mike Wallace. The end of the rotten log to be replaced next is on the left just above the rail. |
 |
 |
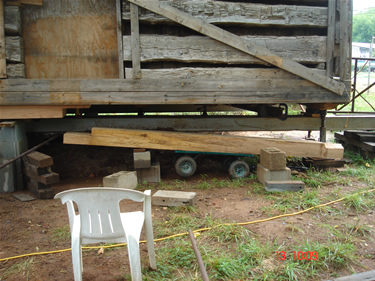
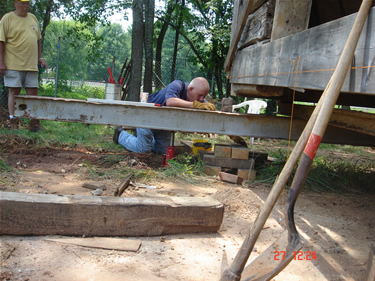
South wall of cabin on Hydraulic bottle jacks and screw jacks. It has been raised to get ready for placement of the bottom sill log 25JUN09. Shows 2 logs of 3 first floor support logs to be replaced. 475 |
South wall on jacks. Shows 2 logs of the required 3 first floor support logs to be replaced. 474 |
 |
 |
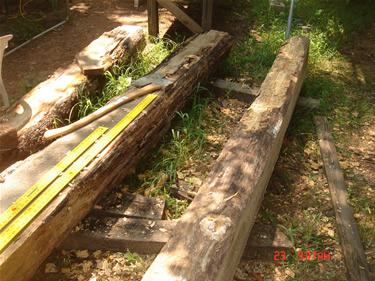
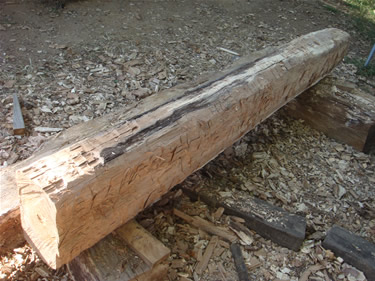
3 oak logs for under floor joist repair. Will replace South half of all three existing West logs. Logs furnished by Mike Wallace. 7776 |
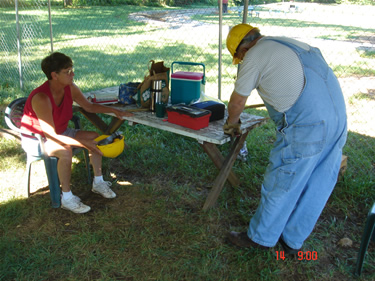
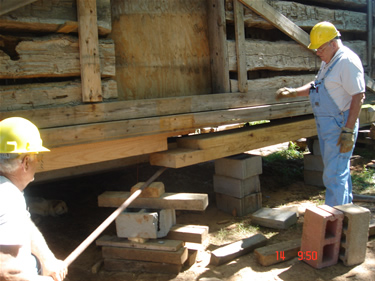
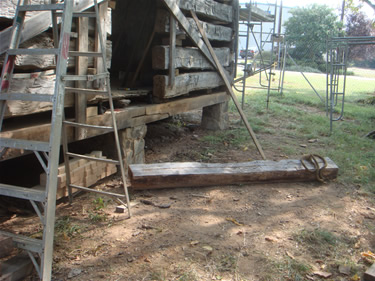
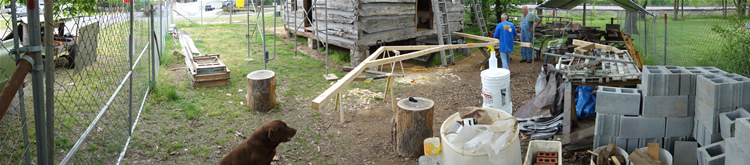
Work area. Picture taken 6-15-2009. 7833 |
 |
 |
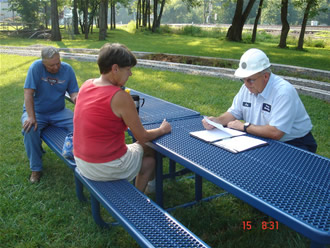
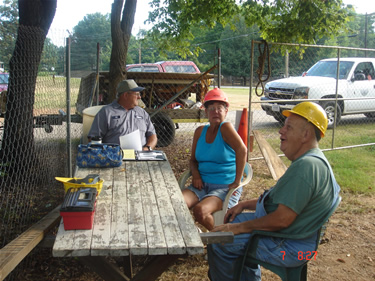
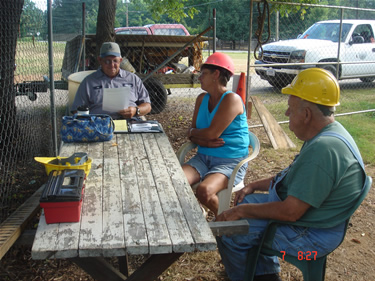
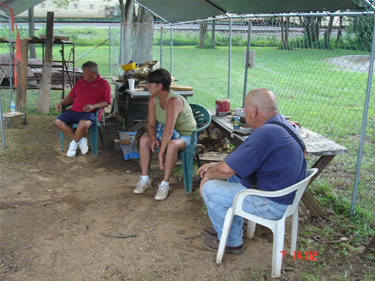
Joe giving safety lesson- Betsy Coulon listening intensely, Bob Johnson may not be listening at all. Picture taken 6-15-2009. 7835 |
Bob Johnson placing one of three logs from Mike Wallace.. 7856 |
 |
 |
South wall held up with hydraulic bottle jacks. Shows the 3 new floor joist logs provided by Mike Wallace. Cut to fit on job site. 470 |
Dick Lewis , look what I did all by myself. Picture taken 6-25-2009. 527 |
 |
 |
Last half lap cut on existing logs. Also visible is the completed 2nd, half lap. 6-25-2009 521 |
Last Floor joist splice. Ready to start acquiring, cutting, and placing 22 feet of 15-1/2"x 8" sill logs. 6-25-2009 531 |
 |
 |
Last floor joist splice. Next we will acquire and start work on the South main sill log. 6-25-2009 533 |
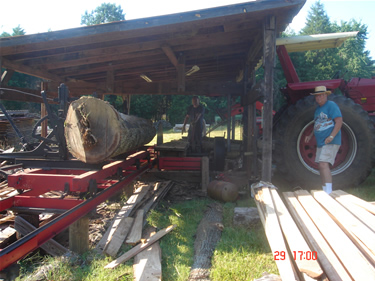
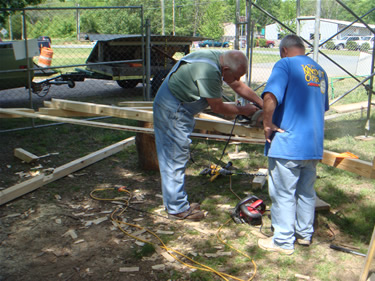
First cut on first sill log 6-29-2009. Mike Wallace in middle under shed, Bob Johnson on right beside the tractor wheel. |
 |
 |
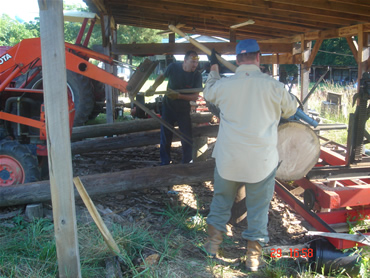
Mike Wallace dragging 2nd sill log from woods for south sill on log cabin. Each of the two logs after cutting to size weigh over 600 pounds. 7918 |
Loading 2nd sill log onto saw mill. 7922 |
 |
 |
Adjusting 2nd sill log. 7924 |
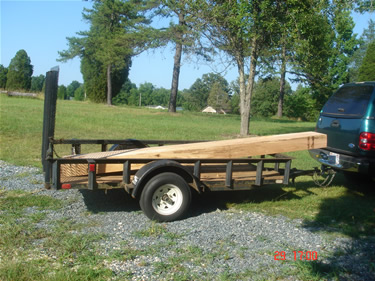
First log loaded on Bob Johnson's trailer. Fresh cut red oak 15-1/2" wide, 8" deep, 12-1/2 feet long 600+ pounds. All log movement after loading on the trailer was by hand with volunteer hand power. 933 |
 |
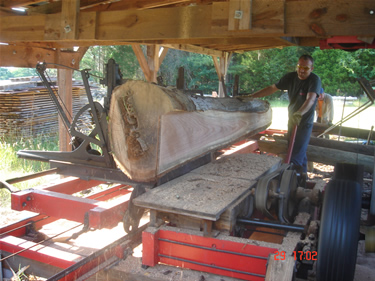 |
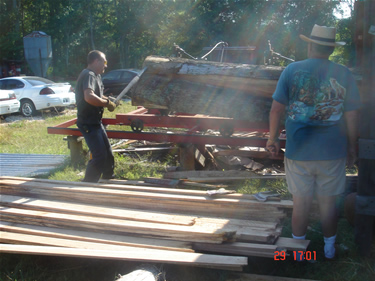
Mike using ax to trim what the saw could not reach. It was a very big white oak log. 7938 |
Mike making 2nd cut on 2nd log. Visible from the saw cut is how much bigger the log is than the blade. 7939 |
 |
 |
Mike sharpening and straightening blade. 7940 |
Working after dark 6-29-2009 Monday. Both logs were on the job site the next morning ready for the final notching to fit the existing logs. 7948 |
 |
 |
7951 Both 600+ pound sill logs at cabin 6-30-2009 Tues. |
7952 Dick Lewis and Betsy Coulon taking a break. |
 |
 |
7958 7-1-09 Melanie, red shirt, checking out work on cabin. She is the one that informed me of the cabin and its location. |
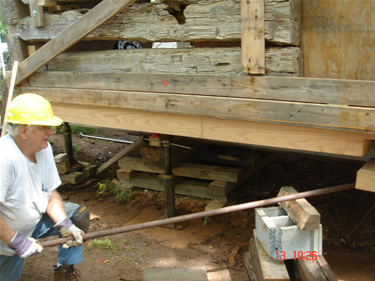
7966 7.3.09 Plum lines for checking sill fit and cabin movement. The cabin moved around some during the jacking but never more than 3/4 " from the start. Holding up the log is the large screw jack that weighs around 60#. |
 |
 |
7967 7.3.09 Hopefully the last cut along blue tape. The three notched logs are the three replacement floor joists provided by Mike Wallace. They will rest on the sill log, also supplied by Mike, when it is in place. Later an additional cut of 1 " was required on an existing log to fit the new sill log. See 8185. |
7987 7.3.09 Checking fit of new sill log. 8 foot long 1-3/8" steel bars were used to lift the sill logs in place. See 8106 below. |
 |
 |
7989 7.7.09 Joe's reaction to Betsy's PINK hard hat- He can not look- Dick shows his approval. |
7990 7.7.09 Joe has recovered somewhat and continues on with the safety meeting. |
 |
 |
7980 7.6.09 Sill log ready to bolt up. After both sill logs are in place the railroad rails will be relocated back to their original moving position under the new sill. This will put all the cabin weight back on the moving steel and ready for lowering onto the foundation. |
7791 7.7.09 Dick and Betsy. Pry bar to lift the 600 pound sill log in middle of picture to left of the yellow hard hat.7791 |
 |
 |
7792 7.7.09 Dick checking clearance of sill log. 7792 |
6894 Picture taken March '09 during the period the work had been stopped. The cabin is still resting on the moving steel. This picture is presently out of sequence. |
 |
 |
8079 Picture taken 7-13-2009 New Tarp from Kennel Pro to provide shade and rain protection. |
8081 Picture taken 7-13-2009 2nd sill log ready to place. End has been Vee notched to match old log, other end has been cut off and half lapped to match end of first sill log. Pretend the dark line at the half lap is not there, mums the word |
 |
 |
8082 Picture taken 7-13-2009 First log in place. 600+ pound log was lifted by hand using 8' long steel pry bars. Shown in use are all 3 large screw jacks. |
8089 Picture taken 7-13-2009. 2nd log on wagon. These rubber tired wagons were rated at 1000# and had no problems holding the 600# logs. |
 |
 |
8090 Picture taken 7-13-2009. Dick cleaning the top of the footing prior to installing cribbing to hold the sill log. Mud would wash onto the concrete foundations during each rain and would need to be cleaned to provide a good work surface. |
8093 Picture taken 7-13-2009. Dick cleaning the top of the footing prior to installing cribbing to hold the sill log. |
 |
 |
8094 Picture taken 7-13-2009 Dick still cleaning dirt from last night 0.3" rain. |
8095 Picture taken 7-13-2009. Second and last sill log is in place ready to raise into final position. |
 |
 |
8096 Picture taken 7-13-2009. Pneumatic rubber tired wagon made moving the sill logs easy. |
8102 Picture taken 7-13-2009. First lift on second sill log. Lifting bar shown on left. The only accident of the job so far is when the second sill twisted off the support blocks and fell 6" breaking the corner off one 12 " block but resulted in no injuries or damage except to the block. |
 |
 |
8108 Picture taken 7-13-2009. 8 foot long 1-3/8" steel lifting bar in use. Large screw jack in back was safety catch on first sill log until rails were replaced and the cabin weight was on it. |
8115 Picture taken 7-13-2009. Both sill logs in place but not holding the cabin up yet. |
 |
 |
8116 Picture taken 7-13-2009. Log in place showing the half lap. This joint will be behind the South stairs and not visible. The original sill log was one piece but we could not handle one that heavy. |
8118 Picture taken 7-13-2009 Log in place but still not held by rails yet- Logs only holding there own weight.. |
 |
 |
8124 Picture taken 7-13-2009 Through for today. |
468 Picture taken 7-14-09 South West Plum bob to check building movement. The amount shown of app. 3/4 " is the maximum movement during the log replacement. |
 |
 |
8131 Picture taken 7-14-09 Dick cutting large nail to use as handle in small 6 pound screw jack. |
8132 Picture taken 7-14-09 Using 1-3/8" 8 foot long steel rod for the final raising of sill log- Had raised yesterday but had to lower to trim existing floor joists by 1 ". |
 |
 |
8134 Picture taken 7-14-09. Lap joint in 600 # sill logs. Lap will be behind rear ( South ) steps and not visible. |
8135 Picture taken 7-14-09. SE corner. Shows temporary pry stand used to raise sill. |
 |
 |
8136 Picture taken 7-14-09. Both 600 # sill logs in place. |
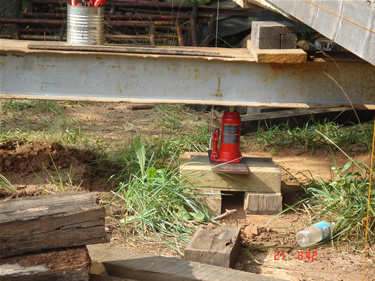
8163 Picture taken 7-14-09. 4 Ton 2 stage jack holding floor joist up. |
 |
 |
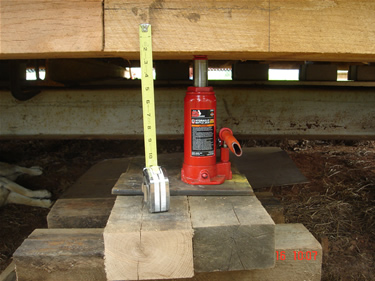
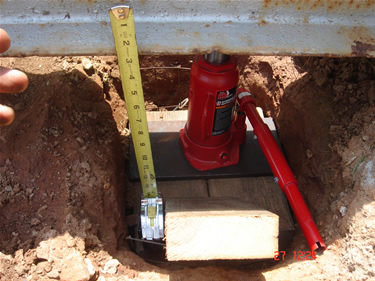
8165 Picture taken 7-14-09. Half lap sill logs- inside view. Shows large screw jack with lifting range of 24-1/2 " to 40 " and weighs 60 pounds. |
8171 Picture taken 7-14-09. Largest and smallest screw jacks visible above. Small screw jack weighs 6 pound and lifting range of 5 " to 7-1/2 ". |
 |
 |
8185 Picture taken 7-14-09. 1" slab removed from existing floor joist log to match up with new sill log. Made 2 cuts today. This 1" cut will be the last cut of the under floor work. |
8207 7-16-09. Starting to remove jacks. Borrowed 3, 12 Ton Hydraulic jacks from LLoyd Quay for North side. |
 |
 |
8200 7-16-09. Final jacking to replace rail. Picture shows south West corner. Steel measuring tapes were locked to use as a reference to enable even raising of the south side. They were initially set to the same reading to see how far raised or to return to some previous height. There were three jacking points and three tapes. |
8201 7-16-09. Final jacking to replace rail. When the rails were repositioned the cabin could be lowered.This would transfer all the weight back to the moving steel for lowering. See 8218 below to see rails back in place. This is the middle jack and tape. |
 |
 |
8202 7-16-09. Final jacking to reinstall rail. The rail had to be moved North 4 feet to allow the installation of the the new South sill logs. The North sill log is one piece but the South replacement log had to be put up in two pieces to limit the weight the volunteers had to handle. Picture shows the South East corner. |
8218 7-16-09. All bad wood replaced, all three rails moved back South to there moving position, all load back on rails, all jacks removed from South side and ready to lower on foundation. Shown is one of three screw jacks used. |
 |
|
8219 7-16-09.. View of the North Sill log. It will be reused. All South side bad wood has been replaced, all load is back on rails, all jacks are removed from South side and ready to lower onto foundation once the piers are built. |
|
 |
|
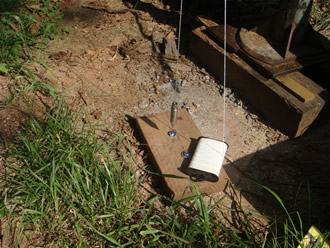
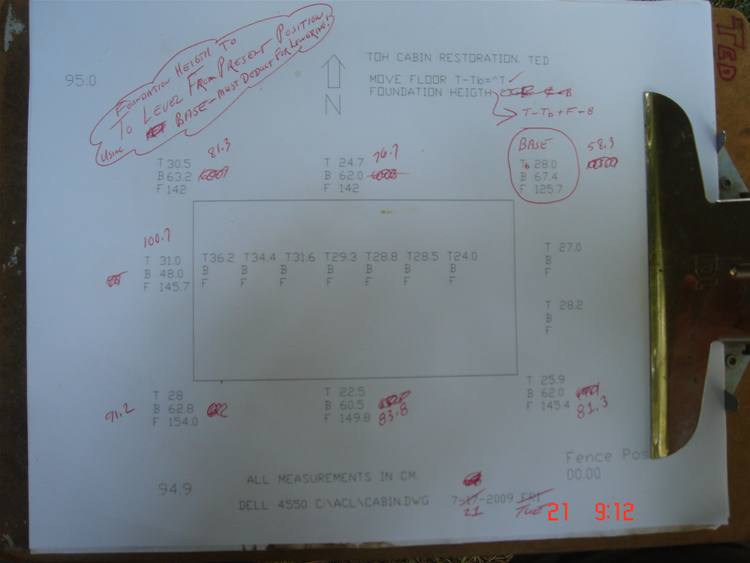
8264 7-21-2009. Tues. Elevations : Top of floor, Bottom of log , and Top of footing. Used to determine the 16 pier heights to end up with a level first floor. This sheet and reprints of this sheet were used many times as the cabin height changed trying to get a level first floor. |
|
 |
 |
8259 7-21-09. Jacking up East end of North I-Beam to remove cribbing to allow dirt removal from under I-Beam. Cabin will be lowered until I-Beam is only 1-1/2 " above footing. |
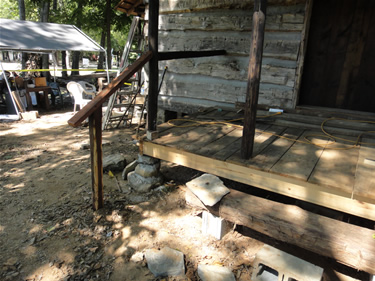
8262 7-21-09. Board to check proposed front porch slope. The 6 foot x 10 foot front porch will be sloped at 1" per foot. The front porch roof was saved and relocated to the cabin enclosure for reuse or for reference. There are pictures of the proposed finished cabin for sale in the store. One half of the sale price will be donated to the restoration of the cabin. |
 |
 |
8263 7-21-09 East end of South I-Beam. Hole on left is to enable 9-1/4 " high 12 Ton bottle jack to lower I-Beam almost down to the footing.. |
8267 7-21-09 Dick checking height of sill off footing. |
 |
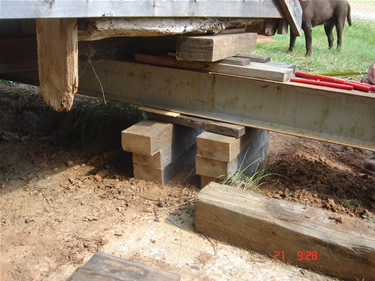 |
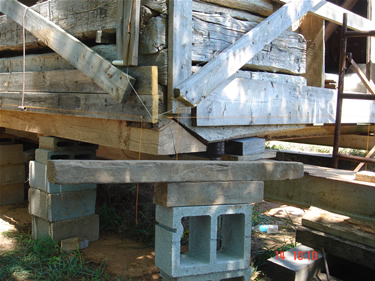
8269 7-21-09. East end of South I-Bean with cribbing relocated onto footing. |
8270 7-21-09. East end of North I-Beam with cribbing relocated onto footing. Foundation blocks, cement, and sand ordered today. Ready mix type S was later delivered so will not need any sand. |
 |
 |
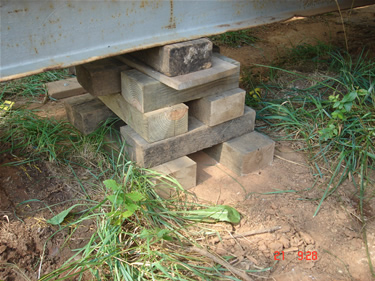
8304 7-23-2009. Steel from Foils 7-22-09 to use as base plate for 12 Ton hydraulic bottle jacks that will be used to lower cabin. |
8305 7-23-09. Second piece of steel from Foils 7-22-09 to use as base plate for 12 Ton hydraulic bottle jacks that will be used to lower cabin. |
 |
 |
8306 7-23-09 1-1/8" steel from Foils 7-22-09. To use as base plate for the 12 ton hydraulic bottle jacks used to raise and lower cabin. |
8312 7-23-09 Items dug from under the moving steel- We hope to find some of the bricks that were manufactured on this site in the early 1900's. Received blocks and mortar mix today. Will not work Friday. Monday will lower cabin to within 1" of final height and then build piers to the correct height. Cabin will then be lowered on to piers. |
 |
 |
8308 7-23-09 Hole under North East moving steel to enable lowering steel to within 1" of footing using 12 ton hydraulic bottle jacks. Jack is 9-1/4" high. |
8309 7-23-09 Hole under South East moving steel to enable lowering steel to within 5" of footing using hydraulic bottle jacks. There are also 2 holes under the west end of the moving steel for the same purpose. |
 |
 |
8316 7-27-2009 NW corner being lowered. Steel tape used to match lowering both West side jacks evenly. |
8319 7-27-09 Hog wire used to lift heavy bottom steel plate after being mashed in to ground by the 12 Ton jack. |
 |
 |
8321 7-27-09 !-1/8 " Steel plate on bottom, wood 4x6 " next, wood 2x6 " next and 6 " x 12 " x 1/2 " steel plate on top. |
8322 7-27-09 Dick jacking South West corner. |
 |
 |
8324 7-27-09 Dick removing cribbing to lower cabin East side. |
8325 7-27-09 Other East jack. Both East corners were lowered 4 ". The steel tapes were set to the same value where they contacted the steel I-beam then measurements were called out in 1/4 " steps to lower the building evenly. Then we would lower the west side 4 ". Total lowered today 8-1/2 ". Tomorrow will lower NE corner to a min. of 1-1/2 " clearance above footing and then match the other three corners so the first floor is level. |
 |
 |
8339 7-28-2009 After using a laser level to level first floor, Dick says I'll put the level up. |
8340 7-28-09 Now where does this go ! |
 |
 |
8341 7-28-09 Final cabin height. North West corner. |
8343 7-28-09 Final cabin height. North East corner. Dirt on plywood is what had to be dug underneath the building from under the I-Beam to allow lowering to the final height. |
 |
 |
8344 7-28-09 Final cabin height. South East corner. I-Beam in top of picture shows how much dirt had to be removed outside the building to allow final lowering . |
8345 7-28-09 Final cabin height. South West corner. |
 |
 |
8346 7-29-09 South East corner. Had to clean water from jacking holes every day for the last 3 days. |
8348 7-29-09 North West corner. 1 " of mud needs to be cleaned from footing before placing foundation blocks, hopefully tomorrow. |
 |
 |
8349 7-29-09 South West corner. |
8350 7-29-09 South East corner showing plum lines to offset foundation pillars 2-1/4 " inside to allow for rock fascia. |
 |
 |
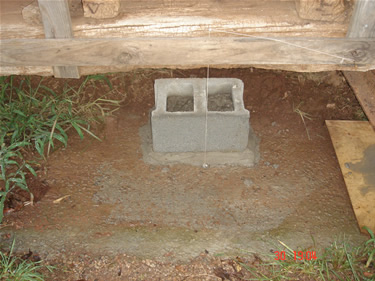
8351 7-30-2009 First foundation block laid in North West corner. |
8352 7-30-2009 First foundation block laid in North West corner. |
 |
 |
8357 7-30-09 Second foundation block in North East corner of the building. |
8358 7-30-09 Second foundation block in North East corner.. White area on footing is the result of pressure washing. |
 |
 |
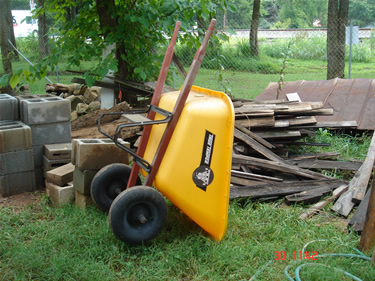
8355 7-30-09 Bob's wheel barrow. |
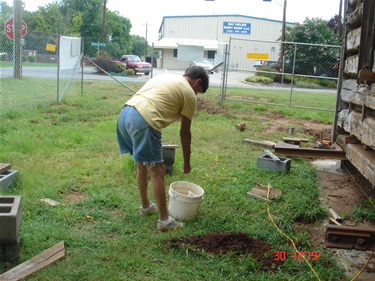
8353 7-30-09 Ted's pressure washer used to clean footing. |
 |
 |
8356 7-30-09 Betsy hauling water for mortar. Water hose town provided burst 5 times in 3 hours. Will try to locate my camping pressure reducer tomorrow. |
8359 7-30-09 Center pillar on North wall. It will be under front porch and not visible. Block is partially filled w/mortar. |
 |
 |
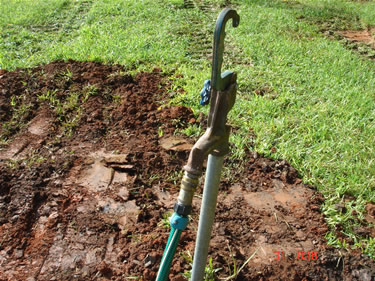
8368 7-31-09 Finally have lawn hydrant. Used my pressure reducer to prevent blowing out another hose. |
8373 7-31-09 Bob filling blocks. |
 |
 |
8374 7-31-09 South East corner block. Wood plum block was cut for foundation block clearance. |
8376 7-31-09 South West corner block. Wood plum block had to be notched for the cinder block. |
 |
 |
8377 7-31-09 Blocks either side of fire place. |
8380 8-3-09 Ready for cut blocks. |
 |
 |
8384 8-4-09 First cut block installed. One more Cut block to be installed before lowering cabin. |
8409 8-5-09 Three blocks installed today under West door. |
 |
 |
8410 8-5-09 Wood shims on piers. Last thing before lowering on Friday. We will not work Thursday to let mortar setup. |
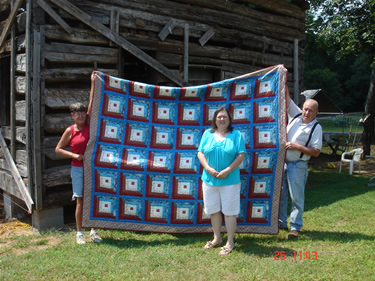
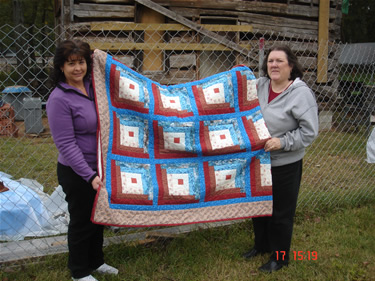
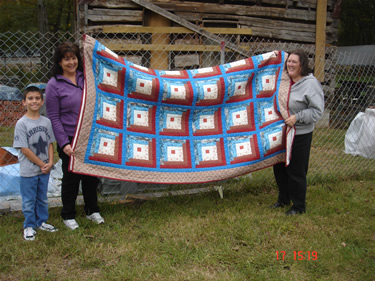
8762 8-26-2009 Quilt made by Barbara Looney standing in front. The quilt will be raffled off on 10-17-2009 at the craft fair with the proceeds being used for the log cabin restoration. |
Finally - The cabin is off the moving steel and onto its own foundation...... 2:15P Friday 8-7-2009 !
|
|
 |
 |
8480 8-7-2009 Small screw jack embedded into bottom log. Visible is sock from the original site captured by steel when loading cabin. |
8482 8-7-09 East and West railroad rails pulled out towards the railroad, by hand by the volunteers. The 1 " grass ropes are visible to Dick's left and at the end of the rail . |
 |
 |
8486 8-7-09 Town using machinery to pull railroad rail moving steel from under the cabin. Middle rail, just in front of bucket, Already in the field was the first rail/steel that had been removed . |
8487-8-7-09 Town using machinery to pull large North I-beam moving steel from under the cabin. South I - Beam had already been removed and placed in the field. The last piece of the moving steel to be removed was this North I-beam . |
 |
 |
8489 8-7-09 Last use of South East plum . Had moved very little as shown by the following pictures during all the many building elevation changes. |
8490 8-7-09 Last use of South East plum . |
 |
 |
8491 8-7-09 Last use of South West plum . |
8492 8-7-08 Last use of South West plum . |
 |
 |
8495 8-7-90 Cabin on foundation !!! Clock on building reads 2:22 . |
8500 8-7-09 Admiring their work . Bill, Betsy, Dick . |
 |
 |
8502 8-7-09 Cabin on foundation !!! Will add center floor supports Monday . |
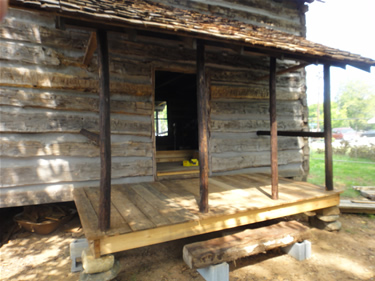
8507 8-7-09 Tin front porch roof saved from cabin . Do not remember where the single piece of tin came from. The cedar shingles are to be installed later . |
 |
 |
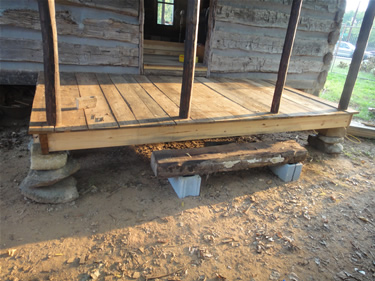
8509 8-10-09 Mon .. Relocated pier to center of building instead of center of door opening . Cleaned around cabin outside from moving steel removal Fri . |
8511 7-10-09 Mon .. Installed first under floor pier under floor joist next to chimney. 7 piers are required. Very hot- Quit early to open the Morrison/sims store . |
 |
 |
8510 7-11-09 Tue .. Cleaning under cabin. Installed two hydraulic jacks behind steel stairs to remove the screw jack that was blocking the pier installation. Cleaned center footing for six of the seven piers to hold the floor up. Very hot- Quit early. |
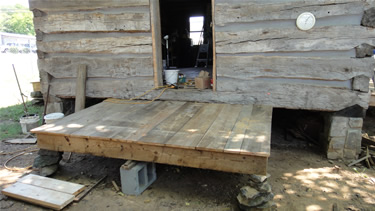
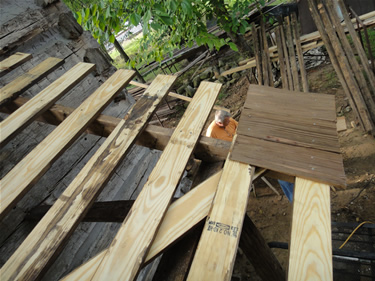
8522 8-13-09 Thur .. placed 6 bottom blocks in the morning and 7 top blocks in the afternoon. Ready for leveling floor tomorrow. 153 pictures. |
 |
 |
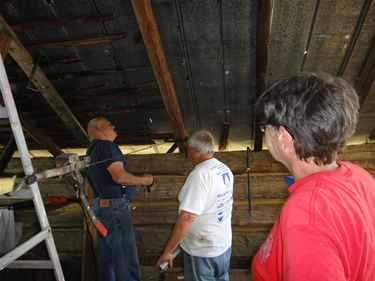
8824 9-4-09 Fri. First work on bad North West joint. Shown above is the two jack stands holding the top logs. They are held up by hydraulic jacks on the bottom. The two safety jack stands are in place in case the hydraulic jacks bleed down. Several bubble levels on the inside of the steel plate is the reference as to whether the hydraulic jacks start bleeding down. There is a 1/8 " gap between the top logs and the bottom logs. |
8821 9-4-09 Fri. Inside 2 Ton jacks on stair landing, steel jacking plates, and levels to keep steel level. Stiff knees transfer load to foundation thru stair landing to first floor then to two screw jacks. |
 |
 |
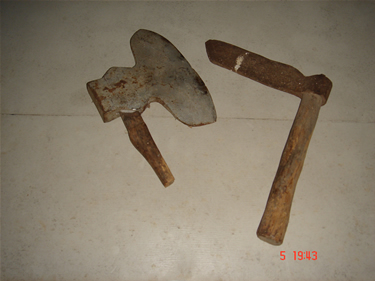
8827 9-1-09 Tue Tools donated to project by Fred P. Gurkin. These were actually very useful in working with the replaced logs. The new handle for the broad ax had to have much work to get a new handle shaped to the old broad ax. See picture 1525 for use of the splitter. |
9-8-2009 Tue 8853 Joe said to put safety cones around dangerous objects. |
 |
 |
9-8-09 Tue 8854 Dick holding just removed log. This is the first log removed. It is on the North end of the West side which faces the pond. |
9-8-09 Tue 8875 Opened up corner joint being held up by a screw jack. The jack stands shown were used to separate the joint for log removal. After the log was removed the screw jack was installed to eliminate any movement from the bottle jacks leaking down as many days would pass before the log was prepared and the wall load placed back on it.. |
 |
 |
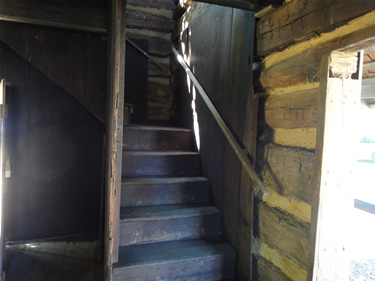
9-8-09 Tue 8876 Newly exposed wall boards showing the stair landing supports. The stair case is made up of 1 " x 16" tung and grove pine boards. |
9-8-09 Tue 8877 The door jam was removed to allow the removal of the bad log. Wood pins are shown, still in wood door jam. |
 |
 |
9-8-09 Tue 8861 One of two proposed white oak replacement logs from Bob Johnson's. |
9-11-09 8899 First tarp up on East side to protect eve from rain. Will install another tarp on West side. |
 |
 |
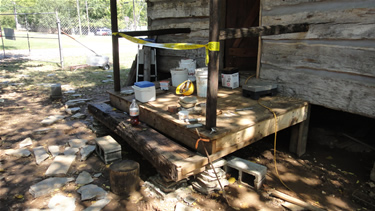
9011 10-9-2009 Fri. Dick and Bob placing scab brace for rotten log to provide structural support and a place to end the fireplace hearth.. |
9024 10-9-09 Fri. 4x6 scab brace bolted in place. |
 |
 |
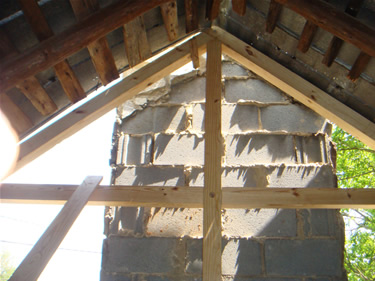
9014 10-9-09 Fri. All chimney material on site except for stone. |
9016 10-9-09 Fri. Blocks, bricks, mortar, fire brick, flue damper and other chimney material. |
 |
 |
9033 10-17-2009 Dana Ojaniit, on left, Winner of the 2009 Fall craft fair, queen size handmade quilt. The $1200.00 quilt was made by Barbra Looney, on right, and donated by her to the log cabin restoration project to benefit the Log Cabin restoration. In the background is the cabin that is under restoration. |
9037 10-17-2009 Dana Ojaniit, on left, Winner of the 2009 Fall craft fair, queen size handmade quilt. Little Kaley Fulford pulled Dana's winning ticket from the box around 2:45P at the close of this years fall craft fair in the Harrisburg park at 6960 Robinson Church Road. The craft fair is a twice a year event hosted by the Town of Harrisburg and the Harrisburg Historical Society to raise money to preserve historic Harrisburg structures. |
| The pictures showing the Masonry work by J. M. Robinson High School masonry class has been moved to a separate web page to provide an easier page to use. Click here to go to the chimney page, then use the back button to return. Thanks masonry class. | |
 |
 |
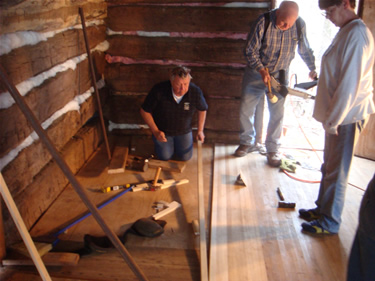
1111 07-26-2010 Mon. Start of work after a 10 month hold. Repairing floor in South West corner. Morrison Bros Lumber is to duplicate poplar flooring. This floor patch will complete the main floor repair.. |
1113 07-27-10 Fri. Start of work to re level stairs and loft floor. The 2nd lift floor joist shown above on right is 2-1/4" high and will be lowered to match the East joists. This will be accomplished by extending the existing notch in the South stair casing board which is holding the end of the joist. To level the stairs, the board in the center of the picture, holding the top of the stairs will be removed, the stair treads will be removed, shimmed level, reinstalled, then the end board will be reinstalled. |
 |
 |
1116 7-27-10 Fri. The top 3 stair treads have been removed showing the West riser. |
1208 8-13-10 Fri. Stairs and guard rail completed. |
 |
 |
5407 8-24-10 Tue. First hued log on right. Broad ax donated by Fred P. Gurkin laying on log on left. Bob Johnson provided the first log that was placed in the West wall of the cabin as shown in the picture on right. |
5409 8-25-10 Wed. New log in position. Red jack stands are being used to hold the top logs up to allow inserting the new log into the notches. Top logs were later lowered to sit on replaced log. This is the first wall log replaced. |
 |
 |
5412 8-26-10 THUR New log ready for door jam peg. |
5415 9-1-10 WED 5415 Two 2 new door frame pegs in bottom. |
 |
 |
5416 9-1-10 WED Middle door frame pegs. |
5417 9-1-10 WED Top door frame pegs. Bob Johnson made most of the pegs. |
Frances Simpson Gray, married to Leonard Gray, stopped by the cabin on Wed 9-1-10 and said her cousin lived in this cabin until sometime after the great snow of 1960. Francis also showed us the hole in the front door where the front door had been locked with a rope thru the hole. I hope to obtain a cabin layout from Francis in later discussions. |
|
 |
 |
1517 09SEP10 Thur Log hued to size on Wednesday and today. Used broad ax,donated by Fred P. Gurkin,standard ax, and mallet. |
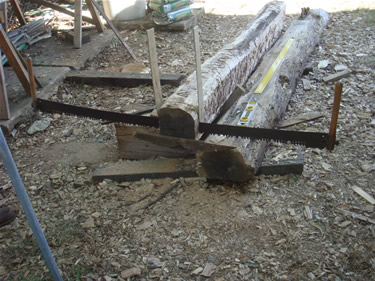
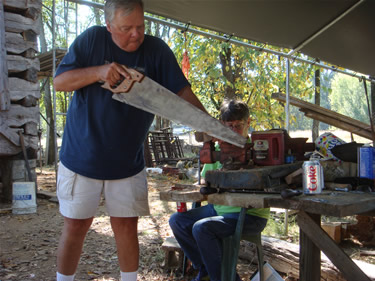
1522 10SEP10 FRI Cutting lap joint with Ted's 8 foot 2 man cross cut saw. Could only cut 1/3 thru before resting. |
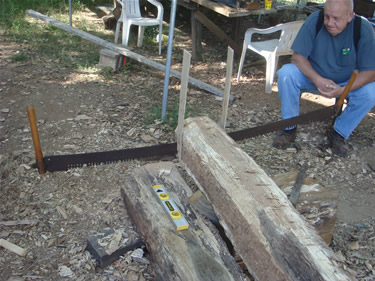 |
 |
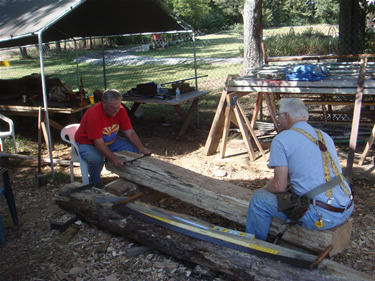
1523 10SEP10 FRI Resting after 5 minutes of using 2 man crosscut saw. It took 3 tries to make the complete cut. |
1525 10SEP10 FRI Notch ready to cut off. Vertical boards were guides for the crosscut saw and the horizontal is a depth mark. The next step was to use the splitter (picture 8827, 9-1-09 ) graciously donated by Mr. Fred P. Gurkin to complete the notch. |
 |
 |
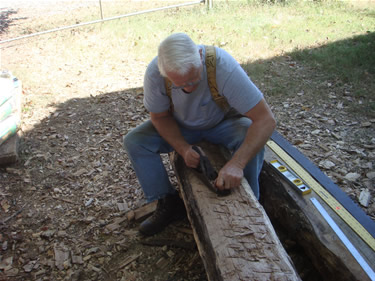
1527 10SEP10 FRI Smoothing log sides with hand plane. The plane worked good except the hardness of the log kept pushing the blade back inside the plane and I was barely able to tighten it enough to prevent slipping. |
1528 10SEP10 FRI Bob trying draw knife. Did not work due to hardness of the white oak log. |
 |
 |
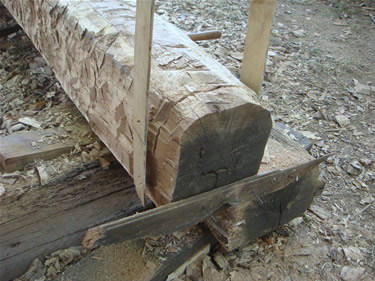
1530 10SEP10 FRI Relocating the 400 # log by hand to the inside of the cabin where it will be lifted into place in the east side of the South wall.. This is the replacement log for the one that was removed from the cabin 10-15 years ago. The removed log is now probably in someone's mantle. The old corner left after the removal was reused as shown in the below picture. |
1534 10SEP10 FRI 400 # log in place. The ladders were used to support one end of the 1-3/8" steel bar and the existing logs supported the other end. This is the second wall log replaced. |
 |
 |
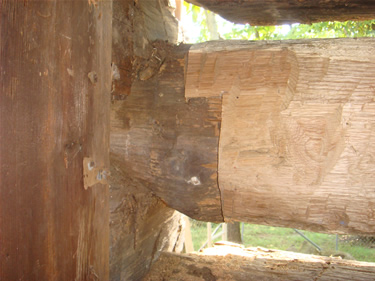
1548 10SEP10 FRI Log notch as seen from the inside. The original log had been removed several years before the cabin was given to the town. The original notched joint was in very good condition and it is both difficult and dangerous to open up a 2 story log cabin corner so we decided to keep it. |
1595 16SEP10 Thur Bill and Betsy Installing jack stands to separate joint to enable old rotten log removal and installation of the new log. Dufas (7/1/2002 - 8/20/2011) on guard. This will be the third and last wall log replaced. |
 |
 |
1596 16SEP10 Thur Screw jack under cabin and outside and inside jack stands in place. |
1597 16SEP10 Thur Old temporary joint ready for removal. Shims on top are to support wall if any of the 4 hydraulic bottle jacks bleed down during the night and before we restart work tomorrow. |
 |
 |
1601 16SEP10 Thur .. New hued log ready for placement tomorrow. |
1640 17SEP10 FRI .. Old log on ground. Had to cut temporary joint out. |
 |
 |
1642 17SEP10 FRI .. Location old log was removed from. Walls still held up by 4 jack stands mounted on hydraulic bottle jacks. |
1643 17SEP10 FRI .. New and LAST hewed log in place. Walls are now resting on the new joint. After 1 cut on the new log to obtain the correct length, the door jams will be installed and thus secure the South wall. |
 |
 |
| 1654 17SEP10 FRI .. View of South cabin wall showing, midway up wall, two of the three new logs that were installed. Shown below the bottom sill are the remaining fire bricks from the fireplace installation- they will be used in the construction of the blacksmith forge. | 1657 17SEP10 FRI .. Work progressing on the restoration of the North ( Front ) door. During the day this front door is placed on saw horses inside the cabin for the sanding. Due to door opening modifications this door will be used in the West wall. |
 |
 |
1664 21SEP10 TUE .. Bill and Dick installing alignment boards in preparation for cutting the East side log ends of the South door. |
1669 21SEP10 TUE .. Bob sanding on origonal North door, will probably use as West door because does not fit well in the origonal location.. |
 |
 |
1678 22SEP10 WED .. Last door to be restored. This North ( Front ) door will be made from the wood from the W.F. Alexander barn restoration. |
1689 23SEP10 THUR .. Bob using draw knife to make door frame peg. |
 |
 |
1692 23SEP10 THUR .. Final peg for West side of South door. The 2x6 horizontal board was used as a drilling guide to hold the heavy duty 1/2" drill with a 1-1/2" drill bit level and straight during the drilling operation. |
1704 24SEP10 FRI .. Bob cutting white oak peg to length before starting to use draw knife. |
 |
 |
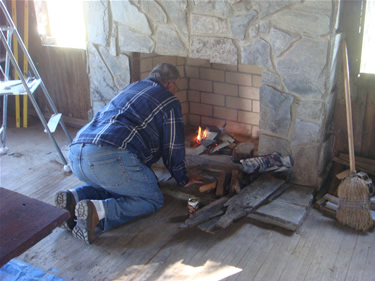
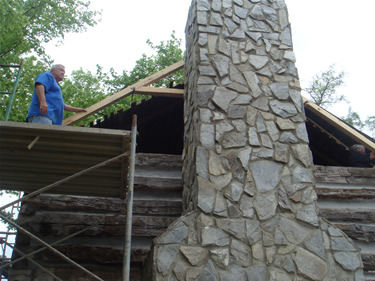
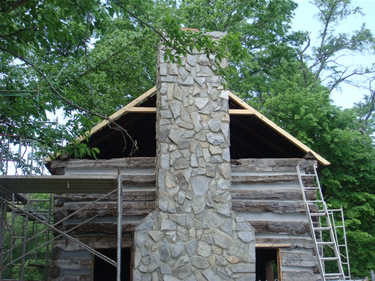
1804 Fire Bug Bob starting the first fire in the Fireplace Friday morning 15OCT2010. The fireplace and chimney were built by the J.M. Robinson High School masonry class finishing the chimney on 28JAN2010. |
1817 .. First Fire, Fri 15OCT2010. |
 |
 |
1777 Fri 15OCT2010. Window lock on window frame. |
1778 Fri 15OCT2010. Betsy removing old original window lock. |
 |
 |
1785 Fri 15OCT2010 .. Window opening ready to install side frames which with the pegs forms a structural member of the wall. |
1821 Fri 15OCT2010 .. First window frame in East side of North window- Has only 1 peg when work finished today. Will install remaining pegs Mon. |
 |
 |
1789 15OCT2010 .. Entire assortment of our door hinges with only 1 complete set. Randy Calhoun of J.M. Robinson High School is to make the missing hinges and any new sets for the doors and sashes. |
1916 28OCT10 THUR .. S.E. window frame finished except for 1 peg in the middle log on the South side of the opening. |
 |
 |
1918 28OCT10 THUR .. Completed N.E. window opening. |
1939 29OCT10 FRI .. Last brace board being removed at 10:47A from the cabin. The mover had installed these braces for the move several years ago. |
 |
 |
1924 29OCT10 FRI .. North side of the cabin after all braces had been removed. Looks very different and much better after several years of looking at the cross braces. |
1947 29OCT10 FRI .. East wall of cabin after all braces have been removed. |
 |
 |
1943 29OCT10 FRI .. South wall of cabin with all braces removed. |
1944 29OCT10 FRI .. West wall with all braces removed. |
 |
 |
2008 11-10-10 WED .. Original cabin windows being restored by BOB. These will be hung on the wall inside the cabin displaying some of the restoration pictures. |
2018 11-10-10 WED .. First chinking on South wall, seems to be working ok.. |
 |
 |
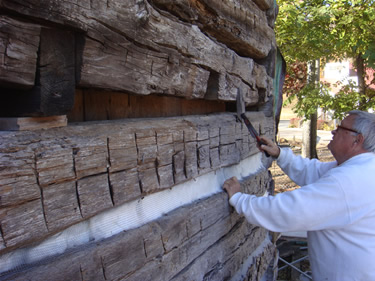
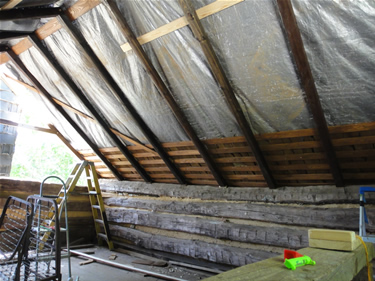
2003 11-11-10 THUR .. West wall showing different installation methods of fiberglass and 1/4" x 1/4" wire mesh as backing for the log lock chinking. Ended up removing most of the fiberglass insulation and only using the wire mesh. |
2015 11-11-10 THUR .. West side first floor level outside chinking almost done. There is 1 remaining joint to be chinked. When the other walls are completed the first floor will be able to be heated by using the fireplace. |
 |
 |
2019 11-12-2010 FRI .. Start of chinking on North wall. |
2026 11-17-2010 WED .. Bill removing support for weather boarding. Weather boarding had been installed some time ago but most had been removed by others on a failed attempt to relocate the cabin 15 or 20 years ago. |
 |
 |
2040 11-19-2010 FRI .. Start of work chinking Friday morning. Weather very cool and hard to apply chinking. |
2041 11-19-2010 FRI .. Chinking completed on East wall on first floor. Windows are being made by Morrison Lumber and with the completed chinking, windows and doors the first floor of the cabin will be able to be heated. The warmer cabin will feel good when installing the flooring. |
 |
 |
2072 11-22-2010 MON .. End of work Monday. North wall chinking finished except bottom opening into crawl space. |
2073 11-22-2010 MON .. End of work Monday. |
 |
 |
2087 24NOV2010 WED .. Bob chinking West end of South wall. |
2089 24NOV2010 WED .. Original chinking. These two pieces shown above are located around 6 feet off the ground next to the chimney on the East side. They will be left in place and visible to show any interested persons. |
 |
 |
2090 24NOV2010 WED .. Close up of some of the original chinking found in the walls. |
2093 24NOV2010 WED .. North side chinking complete. |
 |
 |
2094 24NOV2010 WED .. East side, end of work on the 24th. |
2098 24NOV2010 WED .. View from the South West. Just visible is the original front porch roof, on top of the brown tarp, which was saved and will be used as a pattern or for reference for the proposed 3 new porches. |
 |
 |
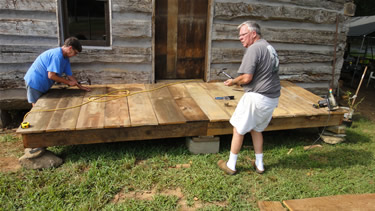
2149 30NOV10 TUE .. Start of flooring installation. This area had to be patched due to rot. |
2155 30NOV10 TUE .. Continuation of flooring installation. Visible between the logs is fiberglass insulation, most of it was later removed. |
 |
 |
2158 30NOV10 TUE .. Having trouble with the center sections of the boards- the tung are too fat or the groves too narrow. The problem was fixed by cutting every other board in half and swapping the halves. |
2163 02DEC10 THUR .. Dark flooring board, third from the left, is an old original board. It was used because we were running out of flooring. |
 |
 |
| 2166 02DEC10 THUR .. Floor installation complete. Work stopped for the winter. December was the second coldest on record and January was not much better. | 2744 04/07/2011 Thur .. First window installation. Bottom window raises and is held in raised position by a wood peg. Had restarted 2011 work chinking on 03-17-2011 Thur. Finished outside chinking on 4-11-2011 Mon. Finished upstairs inside and final chinking on 04-15-2011 Fri. This picture is out of sequence. |
 |
 |
2006 11-10-2010 .. Bill cutting 1/4 x 1/4 wire mesh for the chinking. |
2013 11-11-2010 .. Dick chinking the pond side. |
 |
 |
2026 11-17-2010 .. Bill removing old wood. This wood was added to hold the weather stripping that was added long after the cabin was built. Most of the weather boards had previously been removed prior to our restoration project. |
2087 11-24-2010 .. Bob chinking South or railroad side. There will be a South facing porch covering much of the lower chinking on this side of the building. This was the last work before shutting down for the winter. |
 |
 |
2089 11-24-2010 .. Two pieces of original chinking in the South side of the East wall about 8 feet from the ground. They will to be left in place and exposed for viewing. |
2644 03-17-2011 Thur .. Starting back chinking after the winter shutdown. L to R, Dick, Bob, and Betsy chinking on the North side. Sign made by Bill Matson. |
 |
 |
2722 04-06-2011 Wed .. Ted chinking the West or pond side. After completing the outside the only part left was the inside upstairs. |
2783 04-20-2011 WED .. Work starting on replacing the roof rafters, installing shutters and installing cedar shingles. The stripping is still in place for the cedar shingles but is in such bad shape after removing and reinstalling during the move they will be replaced. Sample cut on 4x4 for rafter half lap on ridge. Roof rafters meet the cabin logs at 37 deg. |
 |
 |
2829 04-20-2011 WED .. First, East, rafter ridge half lap and pin. The original rafters were partially rounded on the bottom so the plan is to round the corners with a draw knife. |
2828 04-20-2011 WED .. Lapped and pined rafter horizontal brace. Pin is 1". |
 |
|
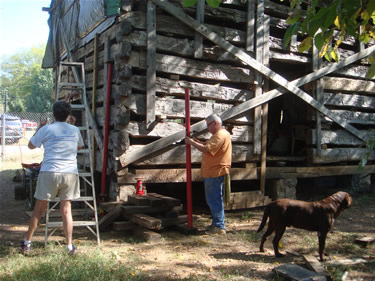
447 4-21-2011 Thur .. Bill and Dick working on the West end gable rafter. First, East, rafter had already been made, pined, erected and measured for the shutters on the East end Yesterday, then taken down and used as a pattern for this West rafter. Pictured just above Dufas ( 07/01/02 - 08/20/11 ), the project guard dog, is the 1920's window frames that may provide some old glass for later use. The two sawed logs shown work great for supports. |
|
 |
|
449 4-21-2011 Thur .. Work progressing on West rafter. All assembly was completed on both East and West gable rafter assemblies by the end of the day except cutting the vertical to length and mounting. The shutter openings will be installed after placing the gable ends. Pictured to left between the trees is our stacked wood that will be used in the fireplace next winter. Tomorrow work installing the end rafters may be done inside due to the expected rain. |
|
 |
 |
2835 04-21-2011 Thur . First installation of new rafter. Later taken down and used as template for opposite (West) side. The template idea did not work due to the irregularity of the cabin and all rafters had to be cut to fit. |
2836 04-21-2011 Thur .. Dick and Bill milling out half lap for West rafters. |
 |
 |
2854 04-25-2011 Mon .. First rafter (East) in place. |
2845 04-25-2011 Mon .. First rafter in place. Will stain wood in place. |
 |
 |
3058 05-05-2011 TUE .. West gable rafter in place to mark notch to sit on log. Later took back down to cut notch and will reinstall next work day . Will pull a string to line up interior rafters . |
469 05-13-2011 Fri .. 2nd rafter from pond installed but not nailed to log yet . Very difficult replacing rafters by raising the roof to allow installing rafter. Thinking about picking a dry spell and tearing roof off to finish rafter installation. |
 |
 |
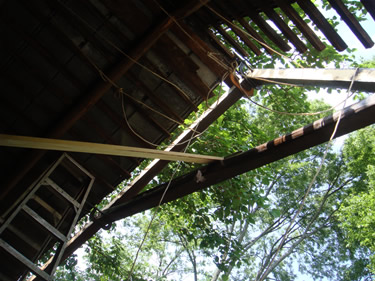
502-s-375 Wed 18MAY2011 .. Removing East side of South roof. Rope in mouth is tied to pulley and cinder block on ground to prevent slipping off the 9:12 pitch roof. West side of South roof has already been removed. |
509-s-375 Wed 18MAY11 .. Dick inspecting board Bill dropped from loft that went thru lawn chair seat. Dick thought Bill would drop the board away from the building but Bill dropped it straight down. |
|
 |
537-s-375. 05-20-2011 .. Bob staining North window on East side, We later re stained a darker stain while Bob was in Colorado. |
561-s-375 5-27-2011 Fri .. Dick, Bill, Betsy checking roof rafter. Cable jack used to pull half lapped rafters to the correct height. |
 |
 |
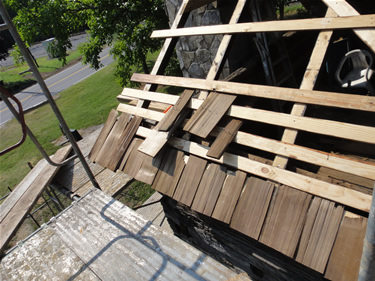
571-s-375 05-27-2011 Fri .. First 2 bundles of shingles brought over from storage in the crib. |
569-s-375 05-27-2011 Fri .. Ropes over top cabin hold the South side tarp up. |
 |
 |
577-s-375w (9:16) 05-27-2011 Fri .. All rafters in place and the South side covered with a town supplied tarp. |
578-s-375w (9:16) 05-27-2011 Fri .. All new rafters in place. The North side still under original tin. |
 |
 |
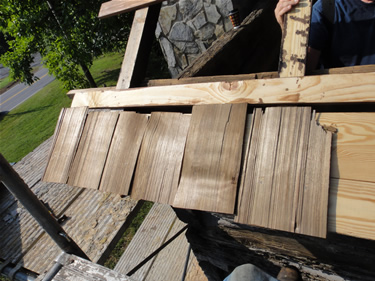
591-s-375 01JUN2011 Wed. .. Laying out cedar shingles to decide on what spacing to use. |
596-s-375 01JUN2011 Wed .. First shingle. |
 |
 |
598-s-375 01JUN2011 Wed .. Installing first shingle. |
599-s-375 01JUN2011 Wed .. First row of bottom shingles. |
 |
 |
600-s-375 01JUN2011 Wed .. First row of bottom shingles, with 1" overhang. |
601-s-375 01Jun2011 Wed .. First full length 24" shingle with 2" overhang. |
 |
 |
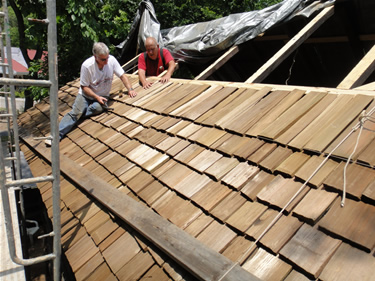
604-s-375 01JUN2011 Wed .. Starting third row of shingles. One days work for 2 people installing shingles. Three other volunteers staining boards. |
606-s-375 01JUN2011 Wed .. View from ground level at end of day. |
 |
 |
611 02JUN2011 Thur .. Bottom end shake in place on first row on South side. |
613 02JUN11 Thur .. Third row shakes completed. Shakes are going up easily but these three rows represent two days of work. |
 |
 |
617-s-375 03JUN11 Fri .. 5 rows shingles (shakes). |
619-s-375 03JUN11 Fri .. Inside view. |
 |
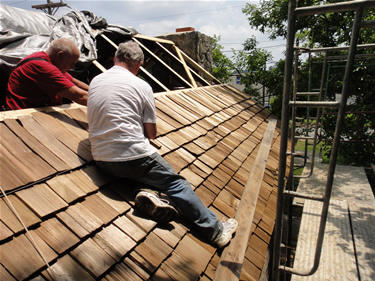 |
633-s-375 06JUN2011 Mon .. Installing 8th row shakes. Gary McCachren worked one day on the roof. |
632-s-375 06JUN2011 Mon .. Dick and Gary finishing 8th row shakes. |
 |
 |
650-s-375 6-9-2011 Thur .. South side finished except for shakes that go over top. |
661-s-375 6-10-2011 Fri .. Bob, Bill, Ted starting work on North side roof after town relocated the scaffold on Thur afternoon. |
 |
 |
667-s-375, 6-15-2011 Wed, .. Start of bottom row on North side. Shakes cut to 2/3 length. |
669-s-375, 6-15-2011 Wed .. Start of 2nd layer on first row. Using full length shakes now. |
 |
 |
696-s-375, 6-15-2011 Wed .. First rooster tail located on West end. Before quitting started rooster tail on East end was started. |
704-s-375, 6-15-2011 Wed .. Temporary tin ridge cap made from the tin removed from the cabin when the re roofing started. The long 2x6 used as a walk board was left over from the relocation from Lower Rocky River Road. |
 |
|
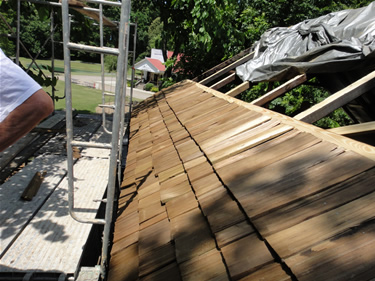
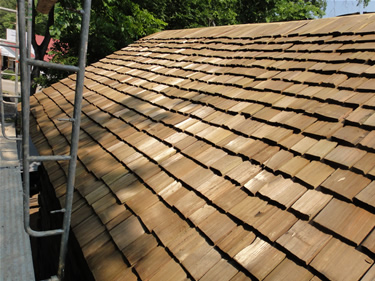
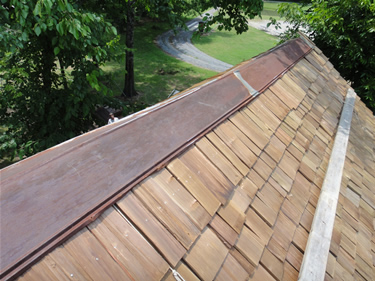
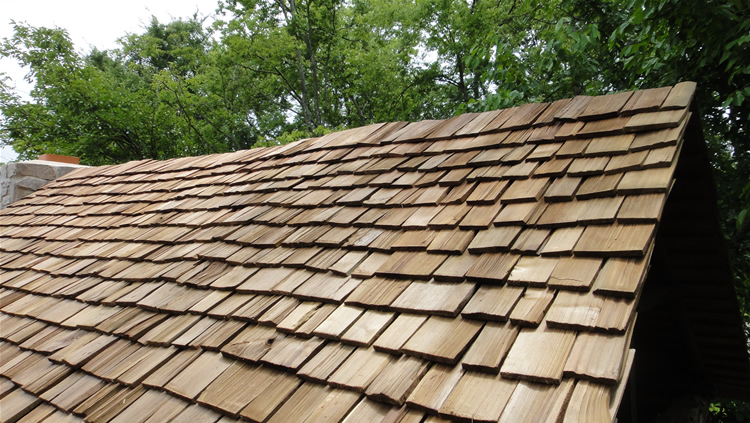
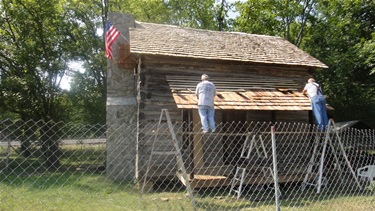
723-s-w-750 06-17-2011 Fri .. Cedar shake roof finally completed 2:30p. |
|
 |
 |
713-s-375 06-17-2011 Fri .. Work site on way down from completing cedar shake roof installation. |
831-s-375 06-22-2011 Wed .. Bill/Betsy installing stair rails. |
 |
 |
840-s-375 06-28-2011 Tue .. South shutter in East gable held in place with C-clamps. |
845-s-375 06-28-2011 Tue .. First two shutters in place on East side of cabin. Shutters are presently held in place by C-clamps. |
 |
 |
846-s-375 06-29-2011 Wed .. First Shutter mounted. |
859-s-375 06-30-2011 Thur .. First weather board. Wood was from the barn restoration. |
 |
 |
861-s-375 06-30-2011 Fri .. First finished corner. |
863-s-375 06-30-2011 Fri .. End of work on Thursday. |
 |
 |
870-s-375 07-01-2011 Fri .. End of work today. Only 1 board on top to complete East gable. |
871-s-375 07-01-2011 Fri .. End of work today. Only missing 1 board behind the chimney, the board is not visible from the road. |
 |
 |
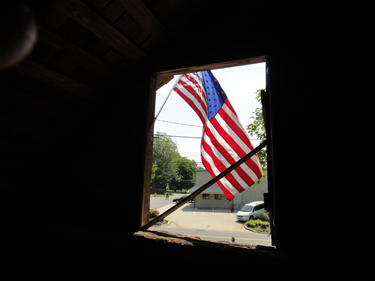
878-s-375 07-01-2011 Fri .. Flag was relocated from store. |
881-s-375 07-01-2011 Fri .. Flag was relocated from store. |
 |
 |
901-s-375 07-04-2011 Mon .. First double hung shutter on rail road side of West end of cabin.. |
903-s-2011 07-04-2011 Mon .. First double hung shutter. |
 |
 |
904-s-375 07-06-2100 Wed .. Last shutter to be hung is on the work table. It is complete except for one diagonal brace on the right side. Is a double hung shutter for the North side of the West gable. |
908-s-375 07-06-2011 Wed .. Last shutter in place. |
 |
 |
909-s-375 07-06-2011 Wed .. Both West side shutters completed. |
912-s-375 07-06-2011 Wed .. West side shutters. |
 |
 |
931-s-375 07-11-2011 Mon .. 11-1/2" boards used as weather boards in cabin gables. These boards were removed from the 100 year+ old W.F. Alexander barn when it was restored between Feb and Aug 2010. They were some of the ceiling and floor boards from three sheds that were removed during the restoration. The trees these boards came from were felled by a hand ax and the ax cuts are clearly visible in the above picture. |
945-s-375 07-13-2011 Wed .. Looking out North window on East side. Flag was relocated from store. |
 |
 |
978-s-375 07-13-2011 Wed .. End of day Wednesday, Very hot. SW corner of gable. |
979-s-375 07-13-2011 Wed .. End of day Wednesday, Very hot. South gable. |
 |
 |
984-s-375 07-13-2011 Wed .. End of day Wednesday, Very hot. South gable. |
998-s-375 07-15-2011 Fri .. Last loft/attic work. Installed shutter latch and brace to hold shutter open. Now all upstairs shutters can be locked in the closed or open position. |
 |
 |
1026-s-375 07-19-2011 Tue .. First door hung. It was the old front ( North ) door but did not fit after the opening was straightened to better secure the wall logs. It is now on the west side on the cabin where the old covered wooden walkway led to two additional buildings of which at least one had a chimney. |
1069-s-375 29JUL11 Fri .. Scaffold finally gone. The town returned the scaffolding to Sunbelt who had loaned it for the cabin restoration at no charge. Thanks Sunbelt. View is of the East side of the cabin. Temp today was 97 with a dew point of 78 gives a Heat index of 108 . Finished the threshold for the South door today. |
 |
 |
1044 07-25-2011 Mon .. Bill and Dick around South door being made using lumber from the W.F. Alexander farm barn restoration. |
1047-s-375 .. 25JUL11 Mon .. South door in place but not hung. Waiting on hinges to be made. |
 |
 |
1060-s-375 25JUL11 Mon. .. South door inside. Door in place but not hung. Waiting on hinges to be made. |
1046-s-375 .. 25JUL11 Mon .. South door in place but not hung. Waiting on hinges to be made. |
 |
 |
1065-s-375 07-26-2011 Tue .. New North door being made. Wood used is from the W.F. Alexander barn restoration. |
1104-s-375 03Aug2011 Wed .. Inside view of North door. Door has not been hung yet as we are waiting on the hinges to be made by a blacksmith. Door was put in place last week. |
 |
 |
1102-s-375 03Aug11 Wed .. Outside view of the front (North) door put in place last week. This picture also shows second porch ledger board which was installed today and is for the front porch. |
1095-s-375 02AUG2011 Tue .. First porch framing. Porch is the back porch located on the South side of the cabin facing the rail road and is sloped 1" per foot. All of the porches will use this same slope. Exterior framing boards are from the 2010 W.F.. Alexander barn restoration project. |
 |
 |
1114-s-375-w 08AUG11 Mon .. North ( front ) porch boxing and floor joists installed today. Porch corners held up by rocks. Exterior framing boards are from the 2010 W.F.. Alexander barn restoration project. |
1117-s-375-w 08AUG11 Mon .. West porch boxing and floor joists installed today. Porch corners will be held up with rocks. Exterior framing boards are from the 2010 W.F.. Alexander barn restoration project. |
 |
 |
1123-s-375-w 09AUG11 Tue .. Board selection for front porch. |
1125-s-375-w 09AUG11 Tue .. Betsy and Bob finishing nailing on front porch. |
 |
 |
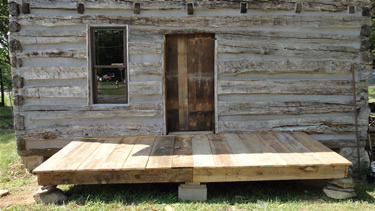
1129-s-375-w 09AUG11 Tue .. Front, ( North ) porch flooring completed. |
1126-s-375-w 09AUG11 Tue .. Start on board selection for West porch flooring . Dick is thinking again? |
 |
 |
1130-s-375-w 09AUG11 Tue .. West side porch completed. |
1132-s-375-w 09AUG11 Tue .. Betsy finishing nailing on South porch flooring. Bill trying out porch ! |
 |
 |
1134-s-375-w 09 AUG11 Tue .. Dick making final saw cut on South porch. Work will cease for 1 week due to vacation. |
1135-s-375-w 09 AUG11 Tue .. Third and final porch flooring completed. All three porch floorings completed in one day. Job well done!!!! All the outside porch framing boards, all the porch flooring boards, all the shutters, and all the gables had been saved from the 2010 W.F Alexander barn restoration for reuse on the cabin and they have been indispensable. |
 |
 |
1996-s-375 West porch framing up. End of work 8-18-11 Thur. |
2000-s-375 .. Porch rafters up on West porch. End of work 8-19-11 Fri. |
 |
 |
2090-s-375 25Aug11 Thur Installed slats for West porch roof and drilled/lagged posts to porch. Cemented porch support rocks. |
2099-s-375 26Aug2011 Fri .. First porch cedar shake shingles on West porch roof. |
 |
 |
2102-s-375 26Aug2011 Fri .. Half way done with West porch roof. |
2108-s-375 26Aug2011 Fri .. Chinking against West building. Finally caught everyone working. |
 |
|
2110-s-375 26Aug2011 Fri .. Finished West roof. Wood preserver has been put on all porch floors and the West 2nd floor shutters. Linseed oil was used on the porch posts. |
|
 |
 |
2230-s-375-w 29Aug2011 Mon .. Bob putting linseed oil on porch posts. The porch post are being made from the old Cedar roof rafters. |
2232-s-375-w 29Aug2011 Mon .. Post that Bob put linseed oil on. All the porch posts for the South and North porches were made today. |
 |
 |
2262-s-375-w 08-30-2011 Tue .. Front porch rafters installed. The slope of the main cabin roof, 9:12, was used on the porches as close as possible. The ledger board had to be placed on a log so the porch roof slopes vary some in pitch. |
2264-s-375-w 08-31-2011 Wed .. Cut off front porch rafter ends, installed diagonal brace, lagged all posts to floor, stained all 12' sheeting boards. |
 |
 |
2267-s-375-w 01SEP11 Thur .. North porch sheeting boards installed. The boards were placed on 8" centers and the full 12' length was used which gave a 14" overhang on the side to help keep rain off the porch floor. |
2268-s-375-w 01SEP11 Thur .. First cedar shake shingles on North porch. The main cabin roof has thick shingles on it but the porches have a thinner shingle. |
 |
 |
2270-s-375-w 01Sep11 Thur .. End of work today on front porch. |
2285-s-375-w 02Sep11 Fri .. Front porch completed. Now steps and handrails to all three porches and a roof for the South ( back ) porch is all that remain to do outside. |
 |
 |
2299-375-w 9-7-11 Wed .. Post installed on South porch. All the porch posts are the old roof rafters that were in too bad a shape to reuse as rafters. Ten of the 18 rafters were used as posts and the remainder will be used as porch railings and handrail posts. |
2302-375-w Thur 9-8-11 .. Rafters installed, showing diagonal brace that will be installed before the roof slats are placed. |
 |
 |
2311-375 9-8-11 Thur Installing diagonal brace on South porch. |
2360-375 9-9-11 Fri .. First cedar shake shingles on South porch. |
 |
 |
2367-375 9-9-11 Fri .. 7 rows completed of the 13 rows required on the South porch roof. |
2368-375 9-9-11 Fri .. Inside view of South roof at end of day. Quit around 12 Noon due to running out of shingles, expect last shingle shipment to be made Tue. Will not work Mon due to holiday. |
 |
 |
2448-375 13SEP11 Tue .. Finished roof on South porch. Received 5 more packs shingles this morning to finish out the roof. No work done on Mon- Took the day off. |
2449-375 15Sep2011 Thur .. Temporary or maybe permanent steps onto the South porch. This log was one of three that were removed from under the cabin due to rot and were replaced with new white oak logs hewed on the site. |
 |
 |
2450-375 15Sep2011 Thur .. Temporary or maybe permanent steps onto the West porch. This log was one of three that were removed from under the cabin due to rot and were replaced with new white oak logs hewed on the site. |
2455-375 15Sep2011 Thur .. Hand rails installed on the North porch sides. The handrails were the old roof rafters that were in too bad a shape to reuse as roof rafters. On the left Bob is putting linseed oil on the old rafters to be used on the South porch, Dick resting, Bill and Betsy building wood storage racks in the crib. |
 |
 |
2458-375 15Sep2011 Thur .. Hand rails installed on the South porch sides. The handrails and porch posts were the old roof rafters that were in too bad a shape to reuse as roof rafters. Friday was a clean up day where most of the old wood collected but not used was moved to the crib for future use. |
2530-375-w 20Sep11 Tue .. West porch rock supports in place and supports for the log step in place. |
 |
 |
2604-375-w 9-28-11 Wed .. West porch hand rails installed, log step in place and tied to porch. |
2607-375-w 9-28-11 Wed .. South door after linseed oil has been applied to the inside side. The outside had already been done. |
 |
 |
2616-375-w 29Sep11 Thur .. West porch rails finished. |
2620-375-w 30Sep11 Fri .. Front porch rails finished. |
 |
 |
2622 30Sep11 Fri .. First porch step rail on South porch. |
2681-375 04Oct11 Tue .. Last hand rail. |
 |
 |
2694-375-w 04Oct11 Tue .. First load of gravel for front porch handicap access ramp base. |
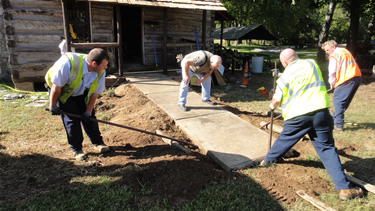
2699-375-w 05Oct11 Wed .. Last concrete block being installed. Block is from the first sidewalk in Harrisburg that was in front of The town Doctors house just up the hill from the cabin. 5 blocks were removed by the Town Of Harrieburg and were saved to be reused here. |
 |
 |
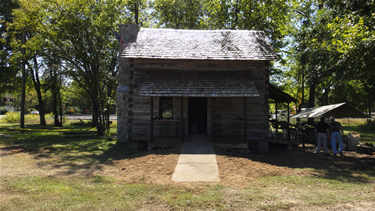
2701-375-w 05Oct11 Wed .. Ramp complete. |
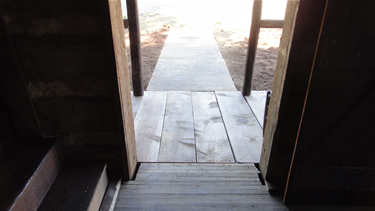
2713-375-w 05Oct11 Wed .. View out front door. |
 |
 |
2729-375-w 06OCT11 Thur .. Mrs W.F. ( Iris ) Alexander on her tour of the cabin. The wood for all three of the porch floors, framing, two of the three inside doors, and all wood in the gables including the shutters came from the restoration work done on a 100+ year old barn on her farm . |
2164-375 12Oct11 Wed.. Tool trailer moved to road due to wet and soft soil from 2" rain. Drop cord shown in road was stolen after work today. |
 |
 |
2766-375 12Oct11 Wed .. Bob making stationary part of rope operated drop latch. |
2770-375 12Oct11 Wed .. Drop latch in place. This door is presently mounted in the West ( pond ) side. It was origonally the front door and the latch was operated by a rope pulled thru a hole in the door to the outside. The hole and rope is still being used on this door to unlatch it. |
 |
 |
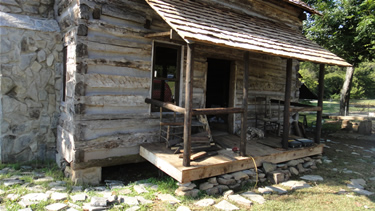
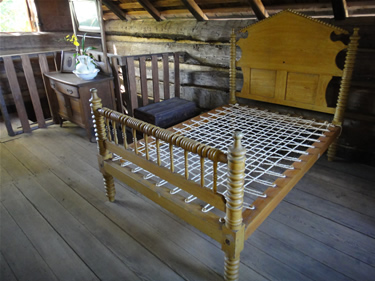
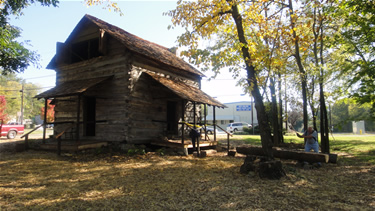
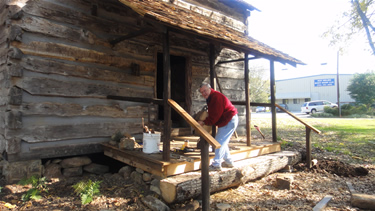
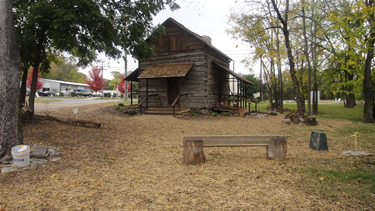
2774-375 13Oct11 Thur .. Front of almost completed cabin. Furniture is already in upstairs. The several floor mats are to try to keep the cabin clean but will be removed for handicap use on opening day. |
2780-375 13Oct11 Thur .. South view of cabin. Logs from park that will be the back ( South ) steps. We may allow persons at the craft fair to try there hand at hewing the log to make the step. |
 |
 |
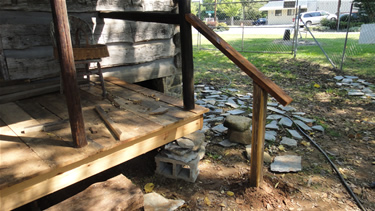
2813-375 14OCT11 Fri .. Very well constructed but temp guard rail installed by Bob for the Grand Opening. |
2809-375 14OCT11 Fri .. Rope bed donated by Stan Rieber, a volunteer from the Morrison/Sims store. |
 |
|
2802-375 15OCT11 Sat .. 30 Gallon Sour Crout jug donated by Richard C. Wing . |
4 Gallon Whiskey jug. |
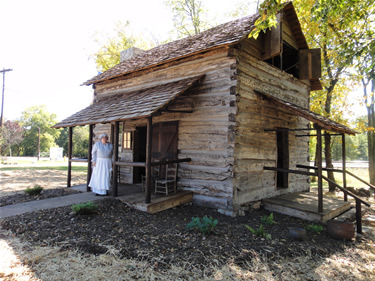
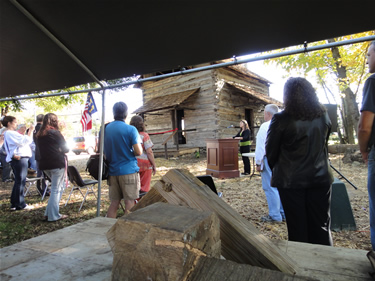
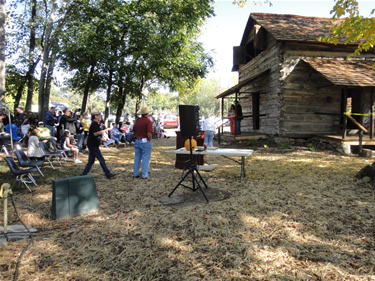
Grand Opening 15OCT11 |
|
 |
 |
2803-375 15OCT11 Sat .. Barbra Looney. |
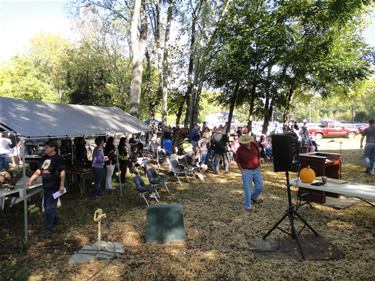
2794-375 15OCT11 Sat .. Singing of the National Anthem |
 |
 |
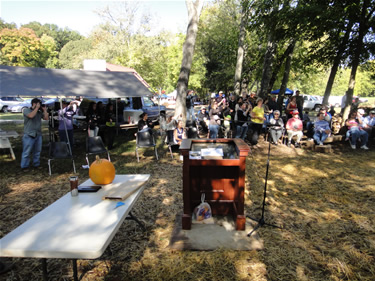
| 2795-375 15OCT11 Sat .. Ribbon cutting, Margaret Ann Stallings and Mayor Tim Hagler. | 2796-375 15OCT11 Sat .. Bill Carriker, on left, cider mill which made 2.5 Gal cider, Bill Matson, in blue, who provides the web server for this web site. |
 |
 |
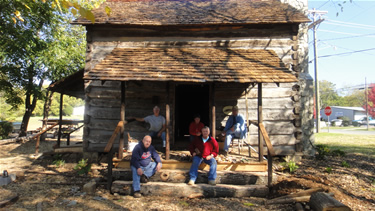
2797-375 15OCT11 Sat .. Grand opening crowd. |
2799-375 15OCT11 Sat .. Grand opening crowd. |
 |
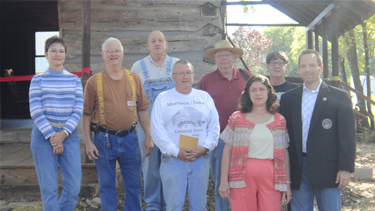 |
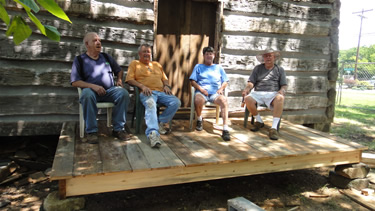
| 1167-375 15OCT11 Sat .. In center of picture, Bill Alexander and Carol Alexander Lyerly. All the wood for the three porch floors and framing, both eves including the shutters, and 2 inside doors came from a restored barn on there mothers farm, Mrs W.F. ( Iris ) Alexander. See 9 rows above for a picture of Iris, #2729. | 1173-375 15OCT11 Sat .. Melanie Bunn Coley, Ted McCachren, Dick Lewis, Bill Williams, Bob Johnson, Margaret Ann Stallings, Betsy Coulon, Tim Hagler-Mayor. |
Continuing the work after the dedication ! |
|
 |
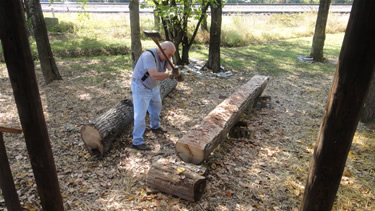 |
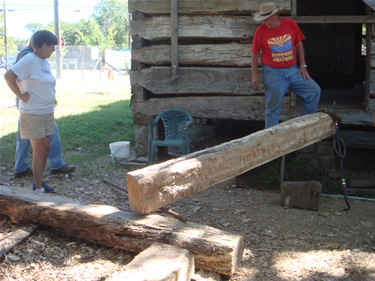
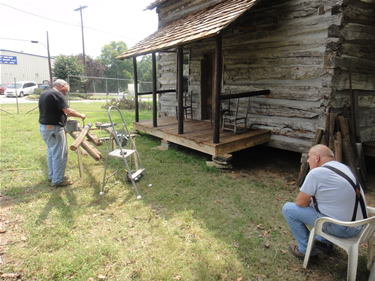
2901-375 18OCT11 Tue .. Hewing the top back step log with a double bladed ax. Will finish with a Broad ax. |
2904-375 18OCT11 Tue .. Hewing the top back step log with a double bladed ax. Will finish with a Broad ax. The ends are level and the correct depth- removing wood in the middle. |
 |
 |
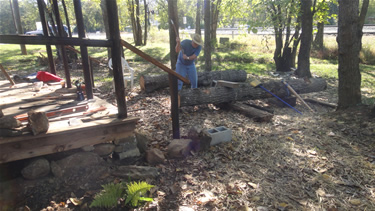
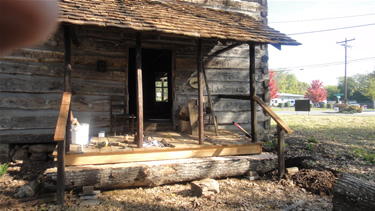
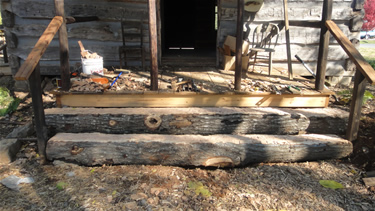
2960-375 26OCT2011 WED .. Bob hewing top step for rear, South, porch. |
2966-375 26OCT2011 WED .. Bill testing new step. |
 |
 |
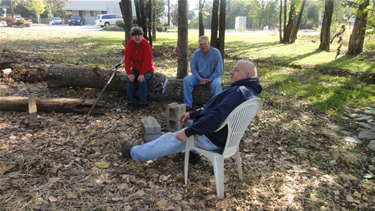
2967-375 26OCT2011 WED .. Break. |
2969-375 26OCT2011 WED .. Top step installed, step is 12'-7" long and weighs app 700 pounds. |
 |
 |
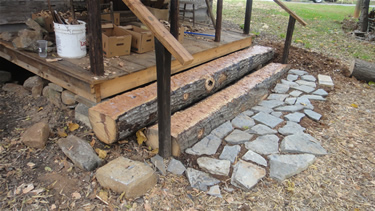
2971-375 26OCT2011 WED .. Bottom step installed. Bottom step is Red Oak, is the top half of the tree and is 10 feet- 10in long. |
2972-375 26OCT2011 WED .. Bottom step is Red Oak and is the bottom of the tree. End of work today- bottom step not leveled yet. |
 |
 |
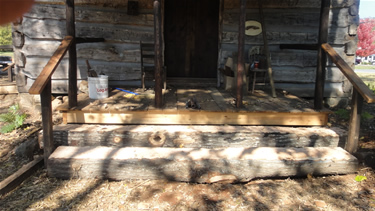
2975-375 27OCT11 Thur .. Back steps completed. Job well done. L to R, Dick, Ted, Betsy, Bill, Bob. |
2977-375 27OCT11 Thur .. Back step logs hewed on site and installed by the volunteers. |
 |
 |
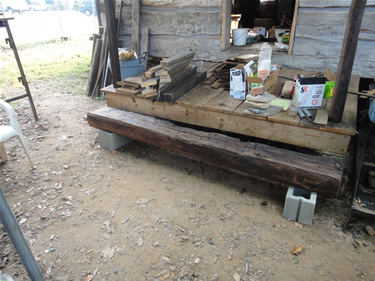
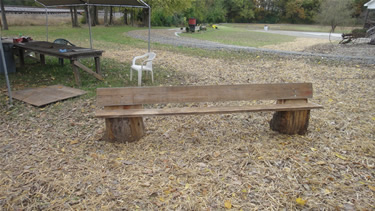
2982-375 28OCT11 Fri .. Log bench. |
2984-375 28OCT11 Fri .. Completed South, ( Back ) steps. Logs were hued on site. Rocks were left over from the Chimney construction. |
 |
 |
2994-375 28OCT11 Fri .. |
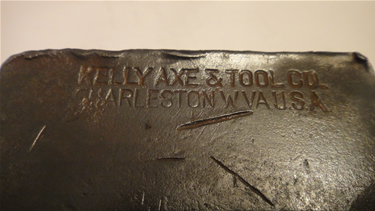
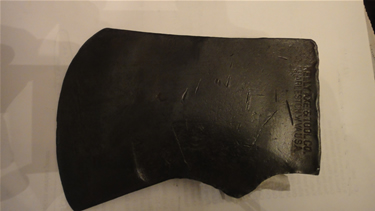
3002-375 28OCT11 Fri .. #8 Kelly Ax, 1904-1930. Ax will be on display in the cabin. Burned the old handle out- Had 12 nails in it to tighten handle of which 3 were hand made. |
 |
 |
3003-375 28OCT11 Fri .. #8 Kelly Ax, 1904-1930. Ax will be on display in the cabin. A new wood handle will be purchased later. |
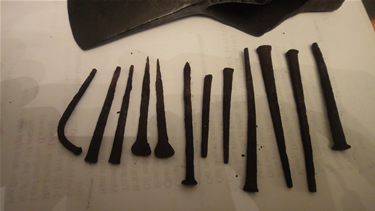
3004-375 28OCT11 Fri .. All these nails were used to help hold the ax on the handle and evidently did a very good job as I had to burn the handle out.. |
 |
 |
3244-375-w 15Nov11 .. South door latch. |
3245-375-w 15NOV11 .. South door latch. |
 |
|
9737-375 03Feb2012 Fri .. Used fence taken down from a Rocky River Road fence replacement job and installed Thur and Fri at cabin by the volunteers. |
|